
 by Ansel on Aug. 18, 2026 | NO COMMENT
If you just accidentally deleted a crucial note, stop what you are doing and turn on Airplane Mode immediately.
This is the golden rule of accidental data deletion. By instantly swiping down and disabling your Wi-Fi and Cellular data, you stop iCloud from syncing the deletion across your other devices, and you prevent background apps from downloading new data that could overwrite your missing text permanently.
I recently experienced this exact panic. While cleaning up my iPhone, I accidentally deleted a note containing critical financial and work information. When I rushed to the Apple Notes app, the Recently Deleted folder was already empty. I needed that document back, but I was terrified that restoring an old backup would completely erase the newer photos and text messages I had saved since then.
If you are trapped in this emergency, take a deep breath. You do not need to be a technical expert to navigate this. Whether you are confused about iCloud syncs or local storage, this guide provides a step-by-step procedure on how to safely recover deleted notes on your iPhone without sacrificing your current files. Let’s get straight to the fix.
Before blindly pressing buttons, you must establish a clear strategy. Choosing the correct procedure depends on how your device handles data and the amount of time that has passed since the deletion.
To help you make an informed choice, review this recovery comparison matrix:
| Recovery Procedure | Success Rate | Time Cost | Technical Skill Required | Safety Risk (Data Overwrite) |
| Recently Deleted Folder | High (if under 30 days) | Low | Low | Zero |
| iCloud Notes Sync (Web) | High (for sync delays) | Low | Low | Zero |
| Professional Recovery Tool | High (for permanently deleted items) | Low | Low | Zero |
| iTunes / iCloud Backup | Medium (depends on backup age) | High | Medium | High (erases current data) |
Selecting the proper method based on this table prevents further complications. But before you start, you must diagnose where your missing document was actually stored.
To successfully perform a recovery, you need to understand how your device processes a deletion. Knowing this before you download software or attempt a backup restore will dictate which method you use.
If your notes are actively syncing with the cloud, a deletion command broadcasts across all your connected Apple devices the second you are connected to the internet. The system intentionally removes the file from the visible interface everywhere. You cannot simply look at your iPad to find a document you just deleted on your primary phone, as the sync is nearly immediate (which is why Airplane Mode is so critical).
Conversely, when a file is removed from your local iPhone storage (and bypasses the 30-day safeguard), it enters a temporary state called “unallocated space.”
The iOS operating system marks that physical memory area as available for new files, but the old data fragments technically still exist invisibly. The moment you download a new application, receive a large text, or take a new photo, you risk a permanent data overwrite, which permanently destroys those unallocated file fragments.

Scan your iPhone and preview recoverable notes before restoring them. Click Here to Free Download
The first and safest solution is the built-in safeguard provided by iOS. When you delete a file, iOS does not erase it instantly; instead, it moves it to a temporary folder where it remains for exactly 30 days. You should check both the mobile application and the web interface.
If your phone synced the deletion before you could turn on Airplane Mode, sometimes a slight delay means the file is still sitting in your iCloud web trash.
Keep in mind that once the strict 30-day window expires, Apple permanently removes these files from this accessible menu.
If your Recently Deleted folder is completely empty, your notes are trapped in that invisible “unallocated space” we discussed earlier. Manual methods will no longer work, and you urgently need a way to extract that data without overwriting your phone.
To solve this problem safely, you can use a professional third-party extraction tool. While there are several reputable programs on the market (such as PhoneRescue and Dr.Fone), I generally recommend Primo iPhone Data Recovery for its straightforward interface.
Note on transparency: These are premium, paid software solutions available for both Mac and Windows PC. However, they almost all offer a free scanning and preview feature. This means you do not have to pay a dime to see if your file is actually recoverable. You can visually confirm your missing work documents on your computer screen before committing to any purchase.

Designed to fit effortlessly into your iPhone data recovery.
Download NowUsing recovery software is a targeted extraction process. By pulling only the specific files you need directly to your computer, you completely avoid replacing your phone's current state. Here is exactly how to do it:
Launch the recovery software on your Mac or PC. Connect your iPhone to the computer using a certified USB/Lightning cable. You may need to unlock your phone and tap “Trust This Computer.” On the main software dashboard, select “Recover from iOS Device.”

Recover from iOS Device
Click the “Scan” button. The software will bypass the standard user interface and deeply scan your iPhone's local storage hardware, looking specifically for fragments in the unallocated space. This process usually takes a few minutes depending on your storage size.
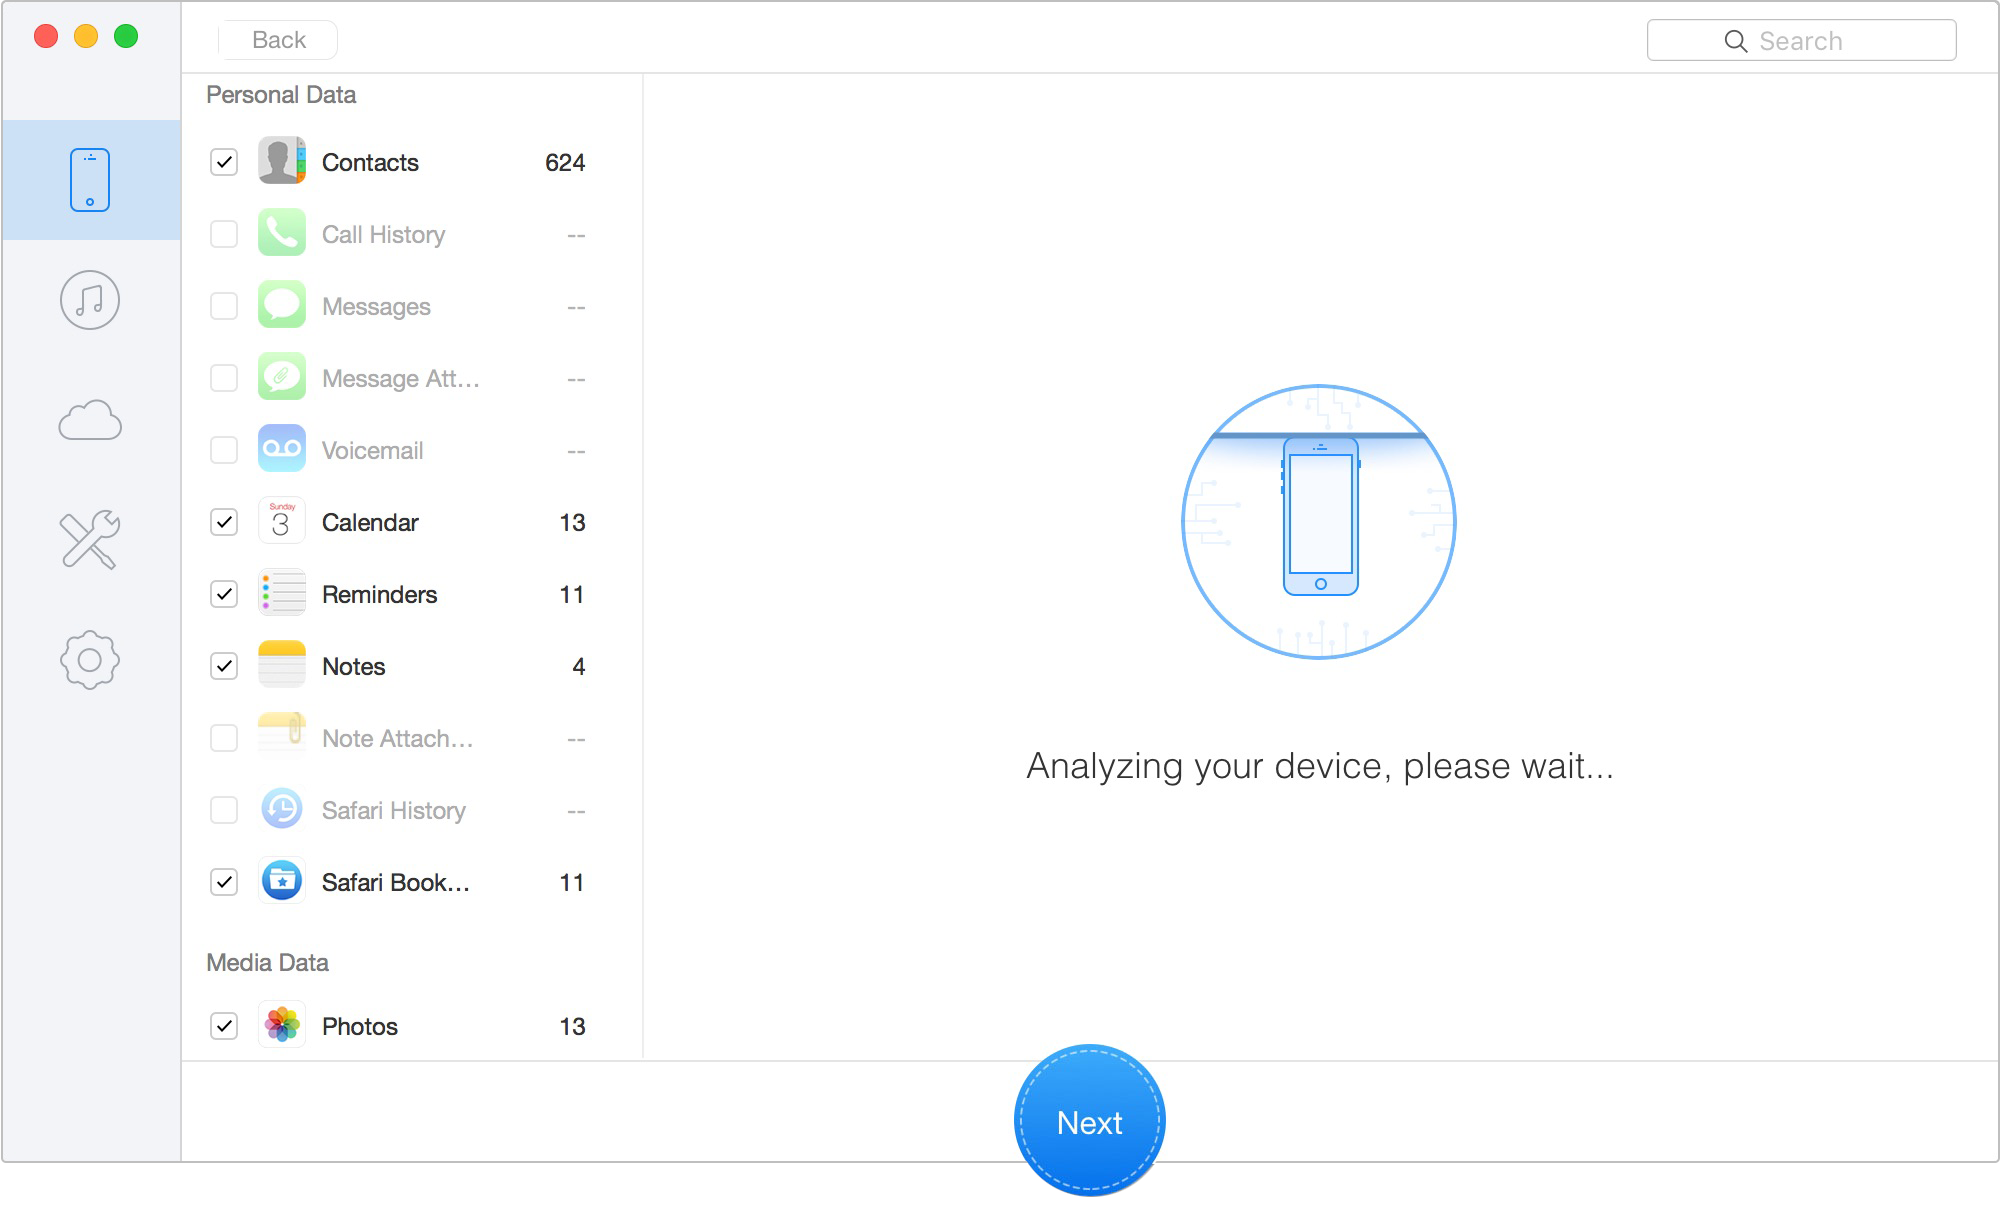
Scan Lost iOS Data on iOS Device
Once the scan completes, a list of recoverable data will appear on the left sidebar. Click on “Notes.” You will see a visual preview of your permanently deleted documents. Simply check the boxes next to the notes you need, click the “Recover” button, and export them safely as text or HTML files straight to your computer desktop.
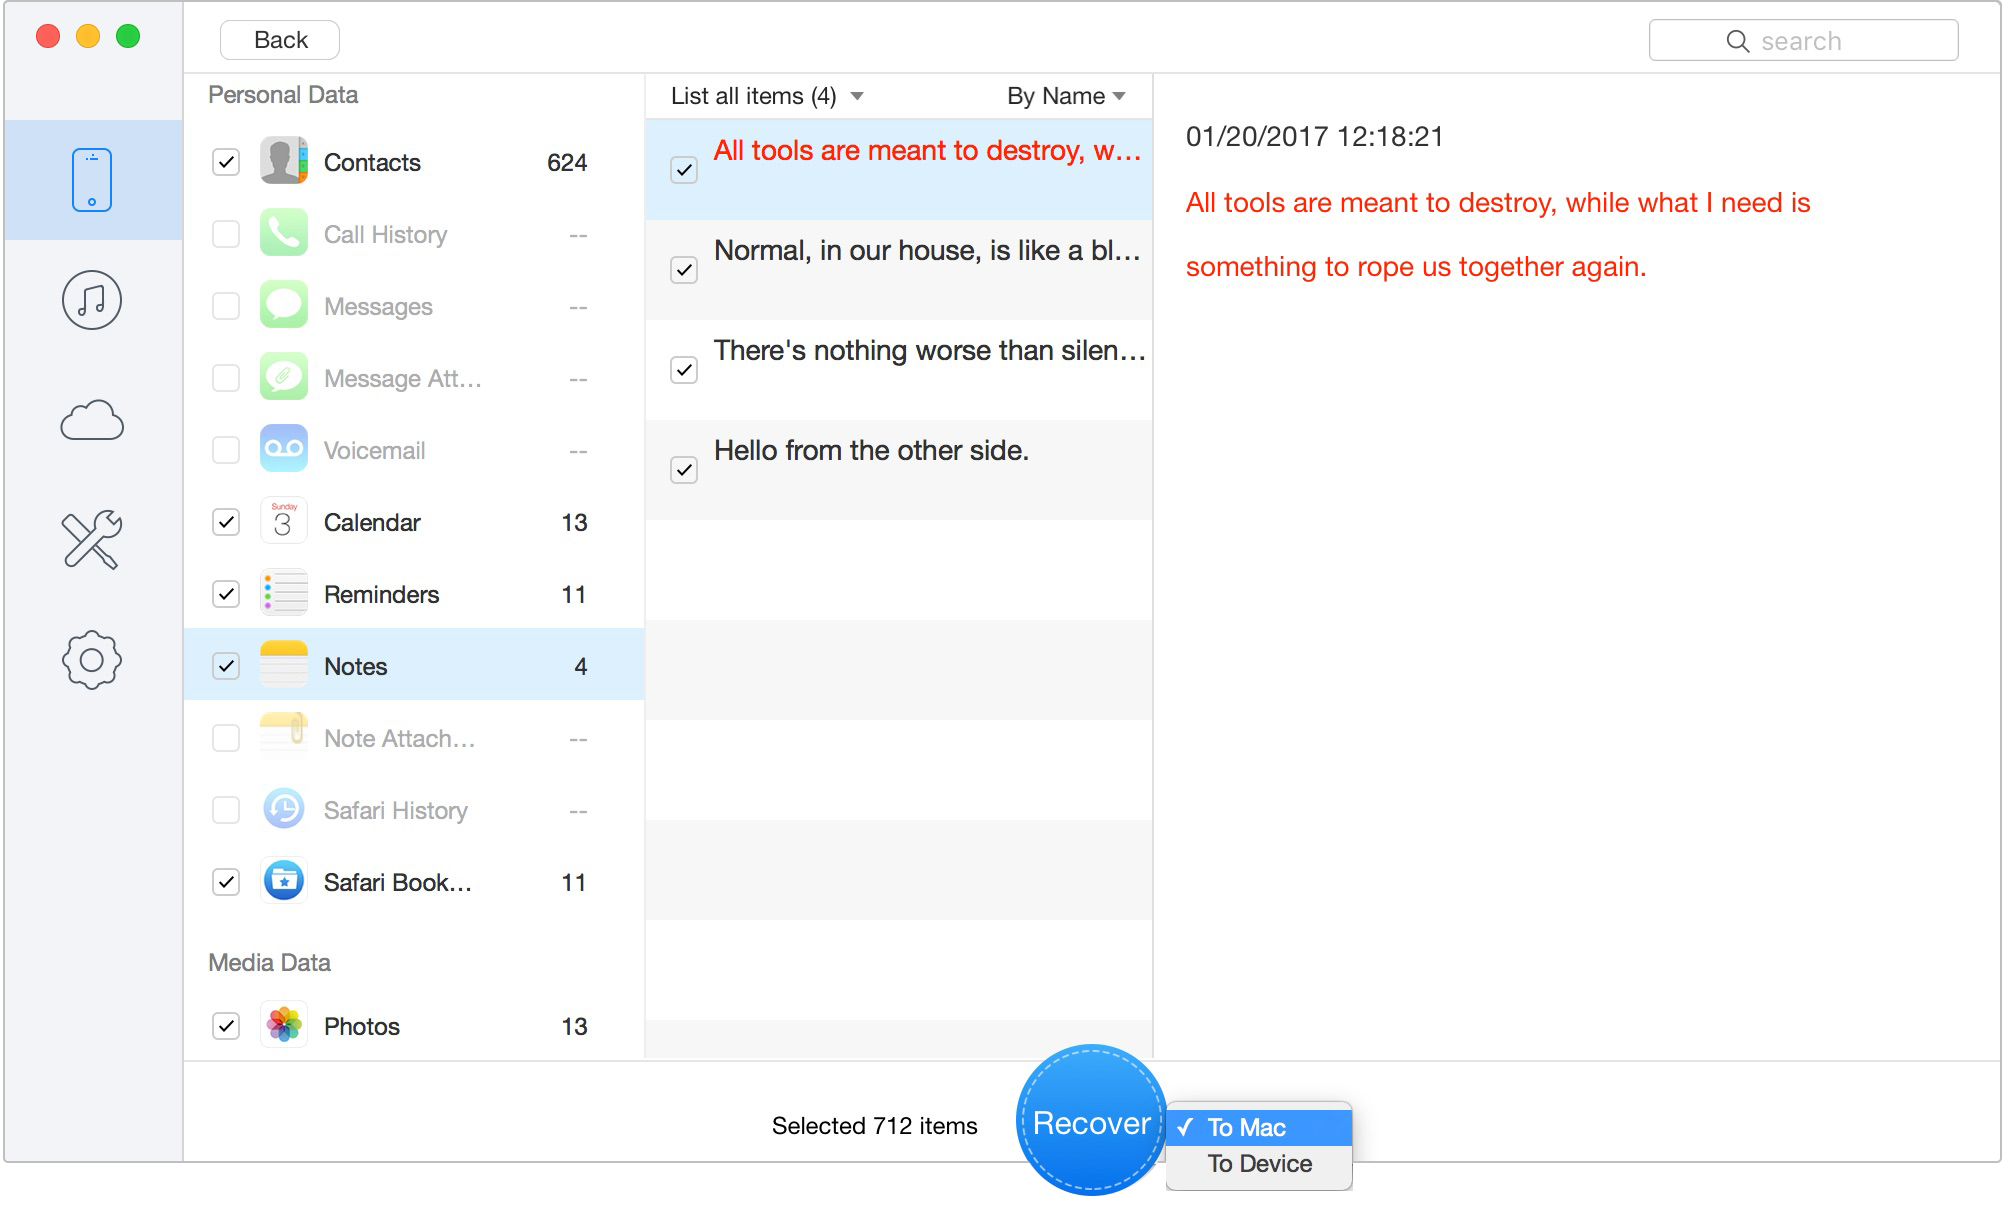
Retrieve Data to Computer or iOS Device
If you decline to use specialized extraction software, your only remaining option is a full backup restore using an iCloud archive or a desktop backup.
⚠️ WARNING: SEVERE DATA LOSS RISK Executing a full device restore will completely wipe your current internal storage and replace it with historical data from your backup file. Any text messages, photos, new contacts, or documents saved after that backup date will be permanently destroyed. You must carefully weigh the value of your missing notes against everything you have saved recently.
If you choose to accept this risk and use this manual method, you must follow the correct steps for your backup type.
To restore an iCloud backup, you cannot simply press a “restore” button in your general settings. You actually have to wipe the phone entirely to trigger the initial Apple setup screen.
Preview and recover deleted iPhone notes without a full-device restore. Click Here to Free Download
When navigating a sudden data loss emergency, you likely have pressing questions. Here are clear, straightforward answers to the most common inquiries.
Yes, but only if you act before a data overwrite occurs. By using professional software to scan the unallocated space on your hardware, you can extract fragments before new activity replaces them entirely. However, if the storage sector has already been overwritten by a new app or video, the data is gone forever.
Apple officially retains these files for exactly 30 days. After this strict window closes, the iOS system automatically and permanently clears the folder, moving the data into unallocated memory.
If you recently signed out of your Apple ID, changed email passwords, or disabled iCloud syncing in your settings, your notes may simply be hidden. Go to Settings > Notes > Accounts and ensure all your associated email accounts have the “Notes” toggle switched to the ON position.
This depends on your specific device settings. Under Settings > Notes, you can enable an “On My iPhone” account for purely local storage, or you can assign your default account to iCloud. Checking both the mobile application and the iCloud web interface is a highly recommended first step when data goes missing.
Yes. A full system restore replaces your current storage entirely. To avoid replacing your current texts and photos, you should use a third-party extraction tool to pull specific records from the backup file without altering your phone's current files.
Losing critical information feels paralyzing, especially when the Recently Deleted folder is empty and you fear a backup restoration will destroy your current photos and texts. You no longer have to choose between rescuing missing work details and keeping recent memories.
If your notes aren't in the temporary trash folder, skip the destructive system reset. By using dedicated data extraction software like Primo iPhone Data Recovery, you bypass dangerous data overwrite risks. These tools allow you to safely scan your device's unallocated space and visually preview your missing records before acting. Do not gamble with your existing data through blind manual methods—assess your storage type, test a free software scan, and confidently rescue your missing information.
Ansel A member of PrimoSync Support Team, passionate for mobile industry and ready to help you with Apple related issues.
Get Up-to-the-minute iPhone Tips & Enjoy Awesome Deals.



Design Simple and Beautiful Software
with Passion & Love

