 by Fiona on May 27, 2016 | NO COMMENT
Want to copy your photos from iPhone to PC and then get rid of them to save iPhone storage? Read this tutorial to learn how to copy photos from iPhone to PC.

Don't have PrimoPhoto? Download it now prior to reading this guide and it will save you quite a lot of time. Click Here to Free Download
To to big Apple fans, it's good to see the iPhone 6 was the most used and popular camera on Flickr, closely followed by the iPhone 5S, 5, 4S, 4, and 6 Plus. That's mostly because the iPhone draws lavish praises from users with every new release, and the newest iPhone gets better built-in camera than previous models (iPhone 6s/6s Plus features 12 MP camera and 4K video).
Taking photos with your iPhone is pleasant, but soon or later, most of us will run into an awkward situation: the iPhone is out of memory and won't allow us to shoot even 1 picture. Removing all pictures from our iPhone is the last thing we want to do, so the advisable way is copying your iPhone photos to computer and then clear them for more room.
In our previous guide, we've talked about methods to copy iPhone photos to Mac, and here we will focus on 2 ways to copy photos from iPhone to PC Windows 10.
If you're using Windows 7 / 8, then please refer to this tutorial: How to Transfer Photos from iPhone to PC Windows 7 / 8
File Explorer is a built-in function of Windows PC that allows you to view and manage files in your devices and drives. The steps to use File Explorer on Windows 7/8/10 have no great difference. Let's see how to copy photos from iPhone to Windows 10 with Windows File Explorer.
Step 1. Plug your iPhone to PC and choose Trust when a notification pops up.
Step 2. You can press the Start key on your keyboard to open "File Explorer" icon on the left pane. Under Desktop > This PC > Double click on your iPhone's name > Open Internal Storage > DCIM.
Step 3. Find the pictures you need in folders. Select the photos you want to copy from iPhone to PC, and click Copy To.
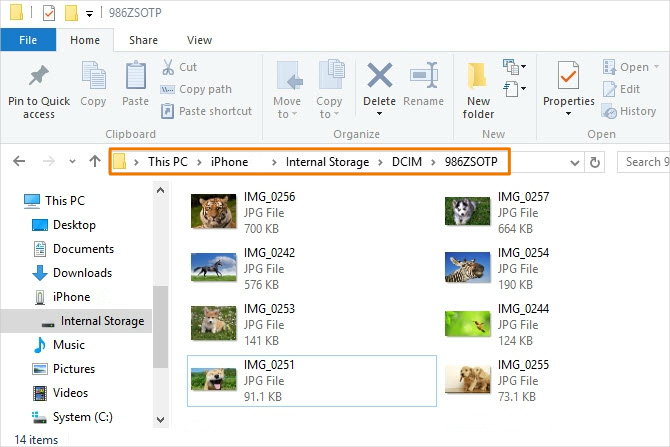
Copy Photos from iPhone to PC with Windows File Explorer
PrimoPhoto simplifies the process of managing iPhone photos by giving you flexible transferring choices. Check its main features on photo management for iPhone:
Designed to fit effortlessly into your iPhone photo management
Download NowStep 1. Have PrimoPhoto installed on your PC, open it, and then connect with your iPhone.
Step 2. In the Export to PC section, select pictures among Camera Roll, Photo Library, and Albums.
Step 3. Select Export and set the destinations to copy iPhone pictures to PC.
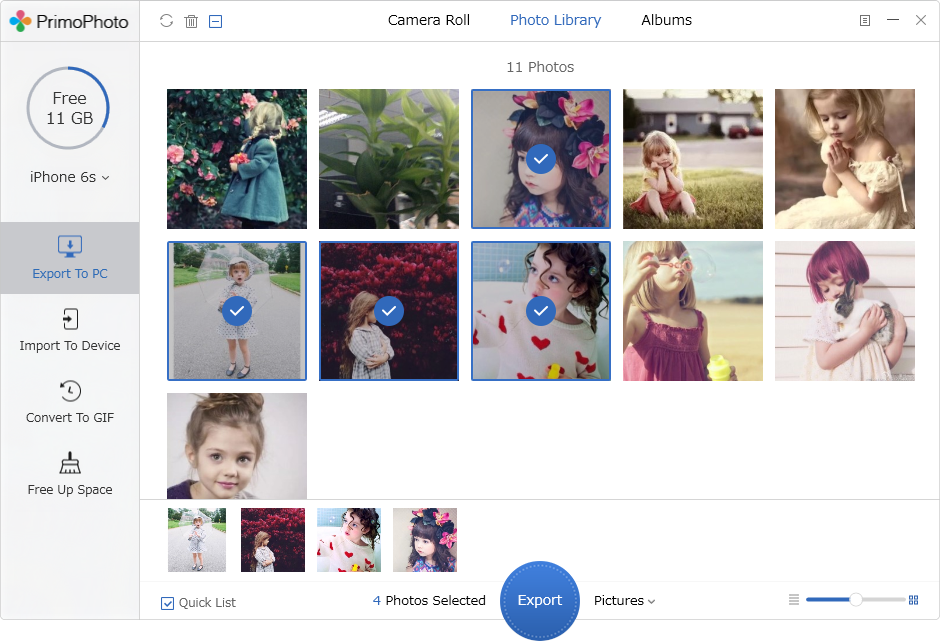
How to Copy Photos from iPhone to PC via PrimoPhoto
We have made a comparison table about the above two methods. It is clear that PrimoPhoto is more flexible and powerful on copying photos from iPhone to PC, including photos in Camera Roll, Photo Library, and Albums. Now you can have a try on PrimoPhoto.
| Windows File Explorer | PrimoPhoto | |
| Camera Roll | ||
| Photo Library | -- | |
| Single Album | -- | |
| One-click to Export | -- |
1. You can use AutoPlay to copy photos from iPhone to Windows 7/8/10, but it only allows you to copy ALL photos from Camera Roll to PC, not selectively.
2. If your photos are quite a few, you can attach them to mail and send it to yourself.
3. If your iCloud storage is running out, you can rely on iCloud Photo Library to copy photos from iPhone to PC.


Fiona Wang Member of @PrimoSync team as well as an Apple fan, love to help more users solve various types of Apple related issues by writing iOS-how-to tutorials.
Get Up-to-the-minute iPhone Tips & Enjoy Awesome Deals.
![]()
![]()
Design Simple and Beautiful Software
with Passion & Love