Need to import your photos from iPhone 6s/7/8/X to PC? This tutorial will show you complete solutions on how to transfer photos from iPhone to PC (Windows 7 / 8 / 10).

With PrimoPhoto you can transfer photos from iPhone to PC/Mac computer freely, and vice versa. Now download it to have a try.
iOS 11 brings amazing features to iPhone users, but it may also cause unexpected issues. Many users reported that photos missing after iOS 11/11.1 update, and you can get them back by reading this guide – 5 Ways to Fix iPhone Photos Disappeared after iOS 11 Update >
On a Windows computer, the simplest way to transfer photos from iPhone to your PC would be the AutoPlay or Photos app. But one thing you should know is that not all your iPhone photos could be imported to your PC through that way. For instance, the iTunes synced photos are not supported, which means only your Camera Roll photos could be imported from iPhone to your PC Windows.
Besides, it's also pretty tricky to get only selected photos from your iPhone to PC with either AutoPlay or Photos on Windows. Because AutoPlay only supports importing ALL photos and videos to PC, and it is untoward to find a single photo within multiple folders / albums with Photos.
To carter to your varied needs on transferring pictures from iPhone to Windows PC, we've prepared you 4 options with detailed instructions to get all your photos imported to PC computer (Windows 7/8/10) smoothly.
Also Read: 4 Ways to Transfer Photos from iPhone to iPhone >
Windows AutoPlay lets you to open different kinds of content, such as photos, music, and video on different kinds of media, such as mobile devices / drivers, CDs, or DVDs. AutoPlay feature is similar on Windows 7/8/10. On Windows 7, the AutoPlay should pop up automatically when you plug in with your iPhone. On Windows 8 or Windows 10, the steps are almost identical. We take Windows 7 as an example.
Step 1: Enable AutoPlay on your Windows 7: Click the Start Menu > Control Panel > Search for AutoPlay > AutoPlay > Turn on "Use AutoPlay for all media and devices".
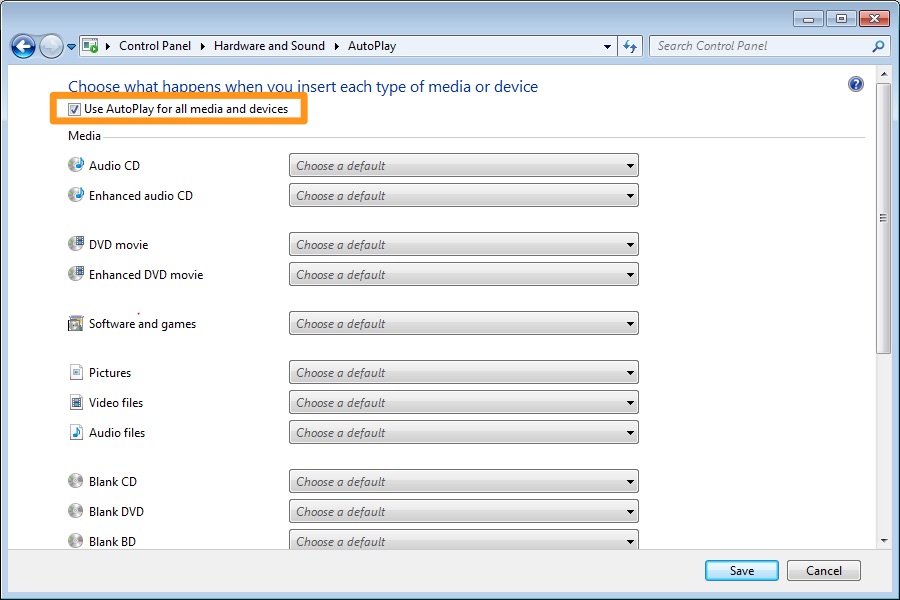
Transfer Photos from iPhone to PC Windows 7 with AutoPlay
Step 2: Connect your iPhone to PC, at the bottom of the new pop-up window, you'll see that your iPhone is plugged in.
Step 3: Select "Import photos and videos". A collection of photos will come out with a notification says it has found new photos. Click "Import" to transfer these photos to your PC Windows.
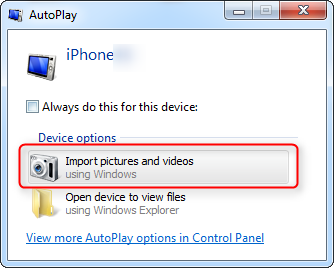
Transfer iPhone Photos to PC Windows 7 with AutoPlay
To know how to transfer iPhone/iPad photos to Windows PC with Windows Explorer, you can refer to this detailed tutorial.
The Photos app coming with Windows 8 is made to view or edit your photos and videos in Pictures library and on OneDrive. Yes, you can also use it to import photos from iPhone to your PC Windows 8. Although the main purpose of this Windows default app is to let you have better place to collect, view, and edit your photos, you still use it to download your iPhone photos easily. Here are the detailed steps.
Step 1: Connect your iPhone to your PC Windows 8 / 10 > Open Photos app > Scroll down to the bottom > Click Import.
Step 2: Choose the iPhone you want to import your photos from.
Step 3: Photos app automatically searches for all photos and videos shooting on your iPhone. Or you can click Select all to get all your photos from iPhone to PC Windows 8 / 10 at once.
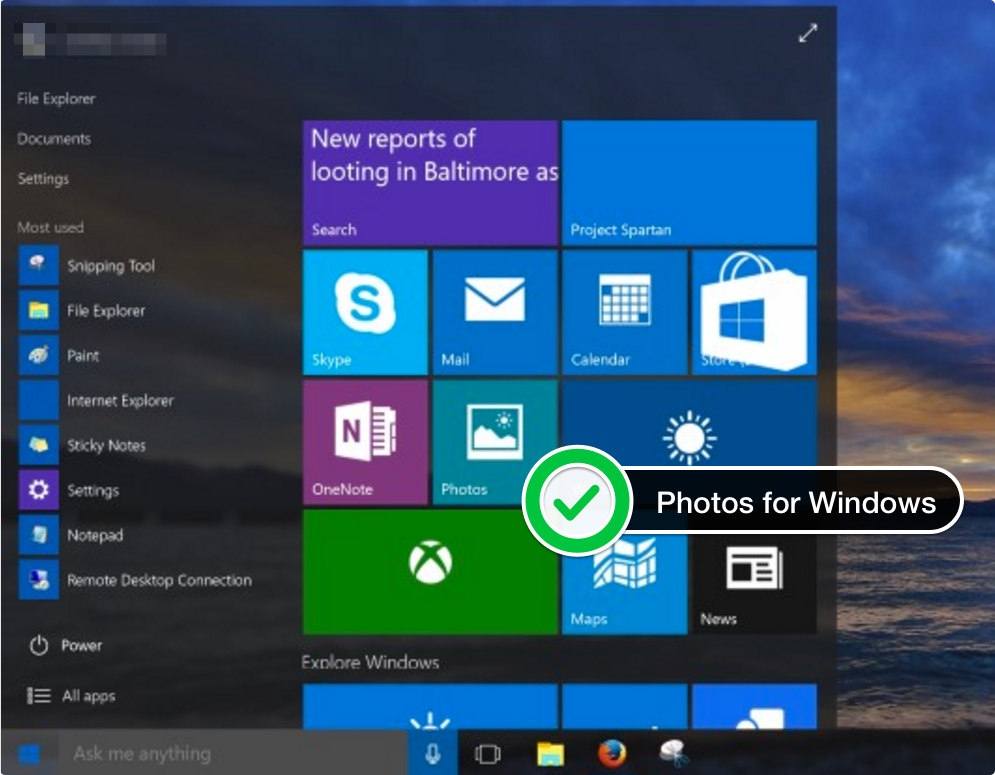
Import Photos from iPhone to PC Windows 8 / 10
Try iCloud Photo Library, which stores all your photos in iCloud, so they're available on all your devices as well as on PC/Mac computer. After enabling iCloud Photo Library on your iPhone, the photos will be uploaded to iCloud, so you can download the pictures from iCloud on your PC.
Step 1. Download iCloud for Windows, and install it on your PC. Sign in with your iCloud account.
Step 2. Choose what you want to sync, and check Photos. Next to Photos, click on Options.
Step 3. Enable iCloud Photo Library, and click Done, then click Apply.
Step 4. Open a File Explorer window, click iCloud Photos.
Step 5. Click Download Photos. Choose the photos you want to download from iPhone to your PC Windows and click Download option.
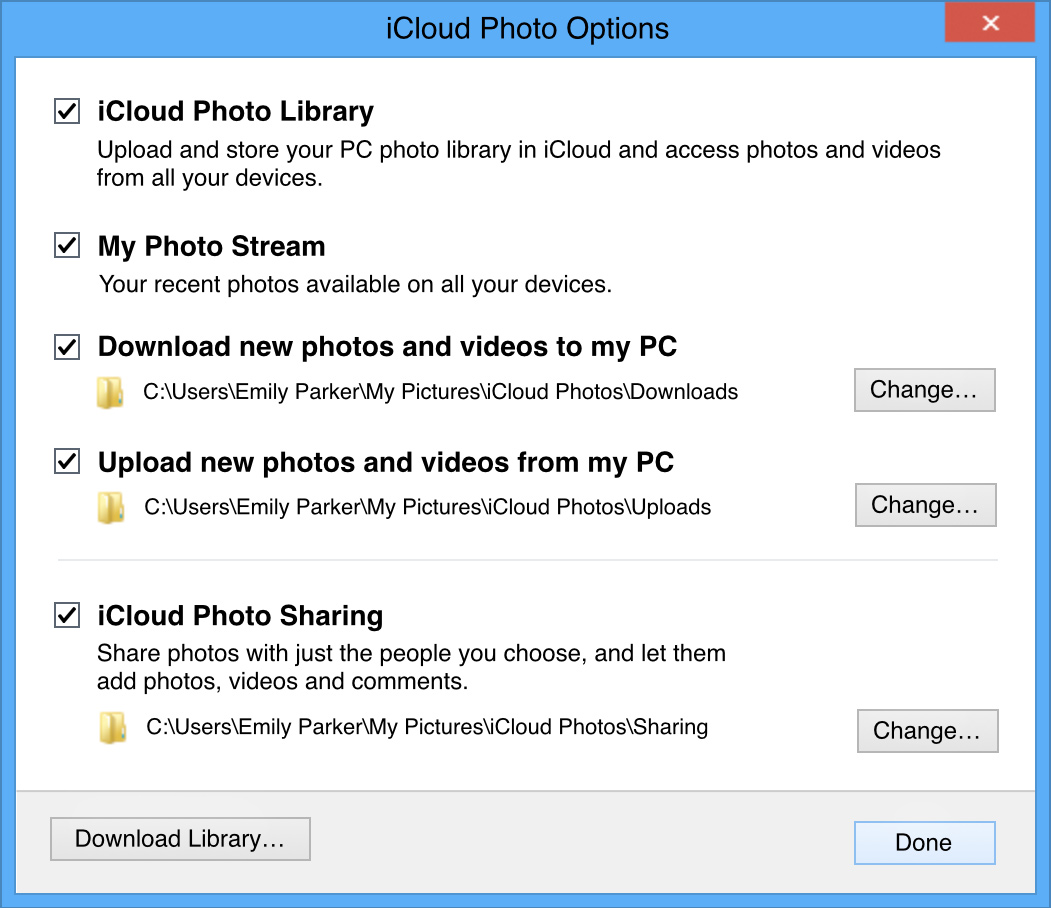
Transfer Photos from iPhone to PC
The other popular approach to transfer photos from iPhone to PC Windows is trying for a cloud service, and Dropbox is wise choice. To transfer photos from iPhone to PC with Dropbox, you need to download and install it on both your iPhone and PC firstly. It gives you 2GB free storage.
Step 1. Crate an account for your Dropbox. Then open the Dropbox app on your iPhone and upload the photos in your iPhone.
Step 2.On your PC, open Dropbox and sign in with the same account on your iPhone. Download the pictures you just uploaded from your iPhone.
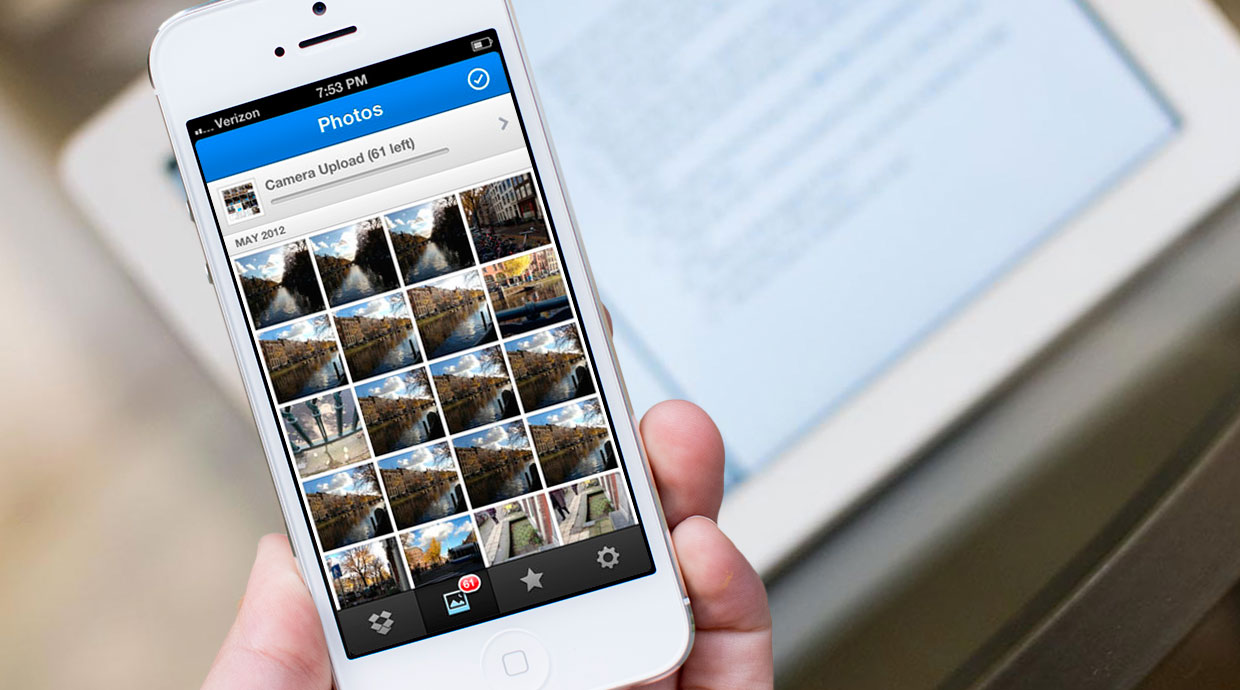
How to Transfer Photos from iPhone to PC Windows via Dropbox
PrimoPhoto, a handy new iPhone photo manager, could be the best alternative option for the above methods. To eliminate the shortcomings of the traditional ways on iPhone photo management is what PrimoPhoto made for. It is easy to transfer all or multiple pictures from iPhone to your PC computer (Windows 7/ 8/10) or Mac, covering photos in Camera Roll, Photo Library, and the entire Album.

Designed to fit effortlessly into your iPhone photo management
Download NowStep 1. Have PrimoPhoto for Windows installed on your PC, and connect your iPhone with an Apple matched cable.
Step 2. Click Export to PC, and select the photos you need from Camera Roll, Photo Library and Album.
Step 3. Set the destination on your PC, and click Export.
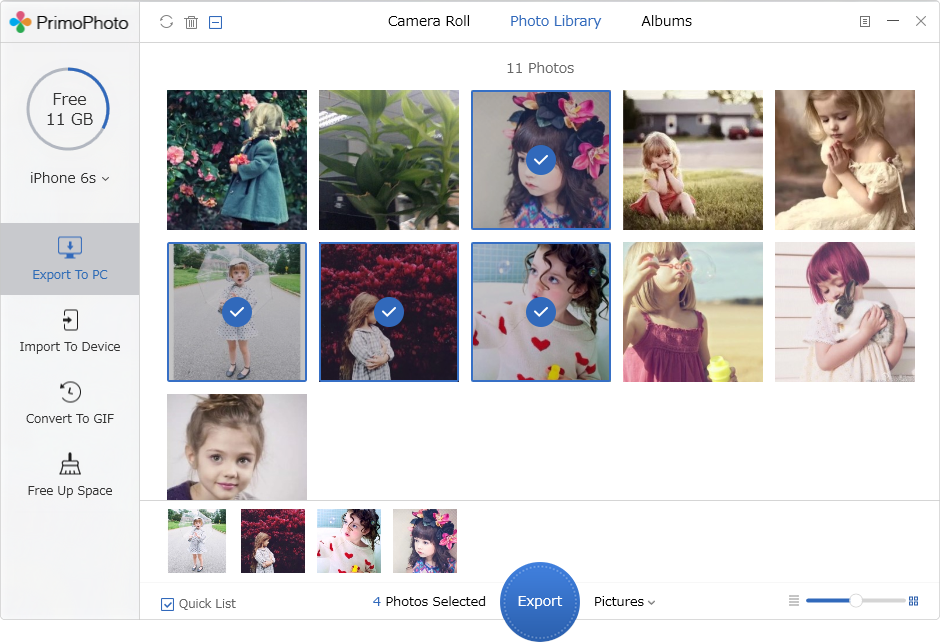
How to Transfer Photos to PC Windows via PrimoPhoto
Here is a comparison table on the above four methods, it is obvious that PrimoPhoto meet all your needs on transferring all kinds of photos from iPhone to PC Windows, and it is more flexible and easy-to-use. Give a try on PrimoPhoto now.
| 1. AutoPlay | 2. Photos App | 3. Dropbox | 4. PrimoPhoto | |
| Camera Roll | ||||
| Photo Stream | -- | -- | ||
| Photo Library | -- | -- | -- | |
| Album | -- | -- | ||
| Selective Transfer | -- | -- |

Fiona Wang Member of @PrimoSync team as well as an Apple fan, love to help more users solve various types of Apple related issues by writing iOS-how-to tutorials.
 Top 6 iPhone Data Recovery Software in 2017
 Top 3 iPhone Backup Extractors in 2017
 How to Download iCloud Backup to PC/Mac