
 by Ansel on Jul. 22, 2026 | NO COMMENT
If your notes have vanished following a recent iOS update, the immediate feeling is sheer panic. You open your device, expecting to see your familiar lists, only to find the app completely empty. I know this feeling well. Recently, after a standard iPhone update, my Notes app showed almost nothing. I tried restarting my phone, but my work checklist and crucial passwords note were still missing. To make matters worse, I was terrified to restore an old backup because I knew any new notes, messages, or photos I had created since that backup would be permanently erased.
Facing a seemingly wiped device when you need your data most is incredibly frustrating. Fortunately, this guide provides a clear, tested hierarchy of solutions to recover your missing data, starting with completely free, built-in Apple methods. We will walk you through exactly how to troubleshoot this issue safely, step-by-step, without risking the data you already have.
Before assuming your lists are permanently gone, we need to check if your files were actually deleted or if they are simply hidden from view. The most common cause of missing notes is an iOS update bug that temporarily disconnects your device from the iCloud server. This glitch makes your screen appear completely empty, even though your text files still securely exist in the cloud.
To rule out this common sync glitch and prompt a fresh connection, follow this procedure. This method works perfectly for Apple Notes, as well as linked third-party accounts like Gmail or Exchange:
• Open the Settings app on your device.
• Scroll down and tap on Notes.
• Tap on Accounts.
• Select your primary account (such as iCloud).
• Locate the sync toggle next to Notes.
• If the toggle is off, turn it on. If it is already green (on), toggle it off, wait 10 seconds, and turn it back on.
Expert Tip: When you toggle this setting off, you might see a terrifying prompt warning you that your notes will be "Deleted from My iPhone." Do not panic. This is completely normal. It only removes the local copies temporarily; your data is still safe in iCloud. Confirm the prompt, wait a few seconds, and turn the toggle back to green. This forces your device to request a fresh, clean sync from the server.
Check your app again. If your lists disappeared due to a simple syncing error, they should begin repopulating within a few minutes. If this does not resolve the issue, move immediately to the next free step below.

Primo iPhone Data Recovery helps you scan and recover lost iPhone data from iOS devices and backups. Click Here to Free Download
If fixing the sync settings didn't bring your files back, it's time to check Apple's built-in safety nets. We highly recommend exhausting these free options before considering any paid software or drastic system restores.
🛑 CRITICAL WARNING: Do not create new notes, take new photos, or download large files while attempting to recover lost data. Your missing text may still exist in the invisible storage sectors of your device's flash memory. Creating new data can permanently overwrite these invisible sectors, making recovery impossible.
Apple provides a built-in holding area for deleted files, retaining them for 30 days before permanent removal.
• Open the Notes app.
• Tap the Folders back button in the top left corner until you see your main directory.
• Look for the Recently Deleted folder under the iCloud or "On My iPhone" section.
• If you find your files here, tap Edit in the top right corner.
• Select the items you need to recover, tap Move, and return them to your standard folders.
Sometimes, your phone completely fails to communicate with Apple's servers, even if your sync toggle is on. Checking the web version of iCloud helps you determine if your data is safely stored off-device. To better understand what may still be stored in Apple’s cloud system, you can review what iCloud backup saves before deciding whether a restore is worth the risk.
• Open a web browser on a computer (Mac or PC) and navigate to iCloud.com.
• Log in securely with your Apple ID and password.
• Click on the Notes web application icon.
If your notes are visible on the website but not on your phone: Your issue is strictly a network communication block on your iPhone. To force your phone to reconnect and pull the data down correctly, you need to perform a Network Settings reset.
Note: A network reset clears out stuck cellular and Wi-Fi configurations, which often fixes stubborn sync bugs.
⚠️ Wi-Fi Warning: Resetting your network settings will completely delete all of your saved Wi-Fi passwords and Bluetooth device pairings. Ensure you know your home or office Wi-Fi password before proceeding, as you will need to re-enter it.
• Go to Settings > General.
• Scroll to the very bottom and tap Transfer or Reset iPhone.
• Tap Reset, then select Reset Network Settings.
• Enter your passcode. Your phone will reboot. Once it turns back on, reconnect to your Wi-Fi network and open your Notes app to let it sync.
If your files were not on iCloud.com and the free methods above failed, you are at a crossroads. You must choose between restoring an old device backup (which carries risks) or using a professional data extraction tool. Understanding these differences is vital so you don't accidentally overwrite the photos or messages you received today.
| Recovery Method | Success Rate | Time Cost | Technical Skill | Safety Risk |
| Account Sync Fixes | High (for hidden files) | Low (5 mins) | Beginner | None |
| Recently Deleted Folder | Medium (if within 30 days) | Low (2 mins) | Beginner | None |
| Full Backup Restore | High (if backup exists) | High (1-2 hours) | Intermediate | High (Overwrites all current device data) |
| Professional Recovery Tool | High (extracts specific data) | Medium (15 mins) | Beginner | Low (Non-destructive, read-only scan) |
If your data went missing after an update, a standard Apple backup restore presents a massive risk. Your device will be rolled back entirely to the date of that backup. Everything you have done since then will be wiped out. If you are unsure about this risk, this article explains what restoring your iPhone means and why it may replace your current data. For users who cannot afford to lose their current data, software extraction tools offer a much safer, targeted solution.

Designed to fit effortlessly into your iPhone data recovery.
Download NowWhen basic troubleshooting fails and you are afraid to perform a complete system wipe, a targeted recovery tool is your best safety net.
If you need a solution without erasing your iPhone, we recommend Primo iPhone Data Recovery. While this is a premium, paid application, we suggest it here as a final resort because it offers a critical technical advantage: it reads your existing device storage and iTunes/iCloud backups without forcing a full system overwrite. If your missing notes may exist in a local computer backup, this guide to an iPhone backup extractor explains how previewing backup data differs from restoring the whole device.
Using a dedicated extraction tool provides unique benefits that manual Apple procedures cannot match:
1. Finds Hidden Fragments: The software scans your iPhone's flash memory specifically for hidden text fragments and recoverable database files that the iOS interface currently fails to display.
2. Visual Proof Before You Commit: It allows you to visually preview the recovered text on your computer screen before you proceed. This proves that your data actually exists before you take any further action.
3. No Data Overwriting: It extracts the found text directly to your computer in a non-destructive manner. This guarantees you can retrieve your missing information without initiating a forced, risky device restore.
• Download and install Primo iPhone Data Recovery on your Mac or PC.
• Connect your iPhone to your computer using a certified USB cable.
• Open the software and select the "Recover from iOS Device" option.

Recover from iOS Device
• Allow the tool to safely scan your storage.
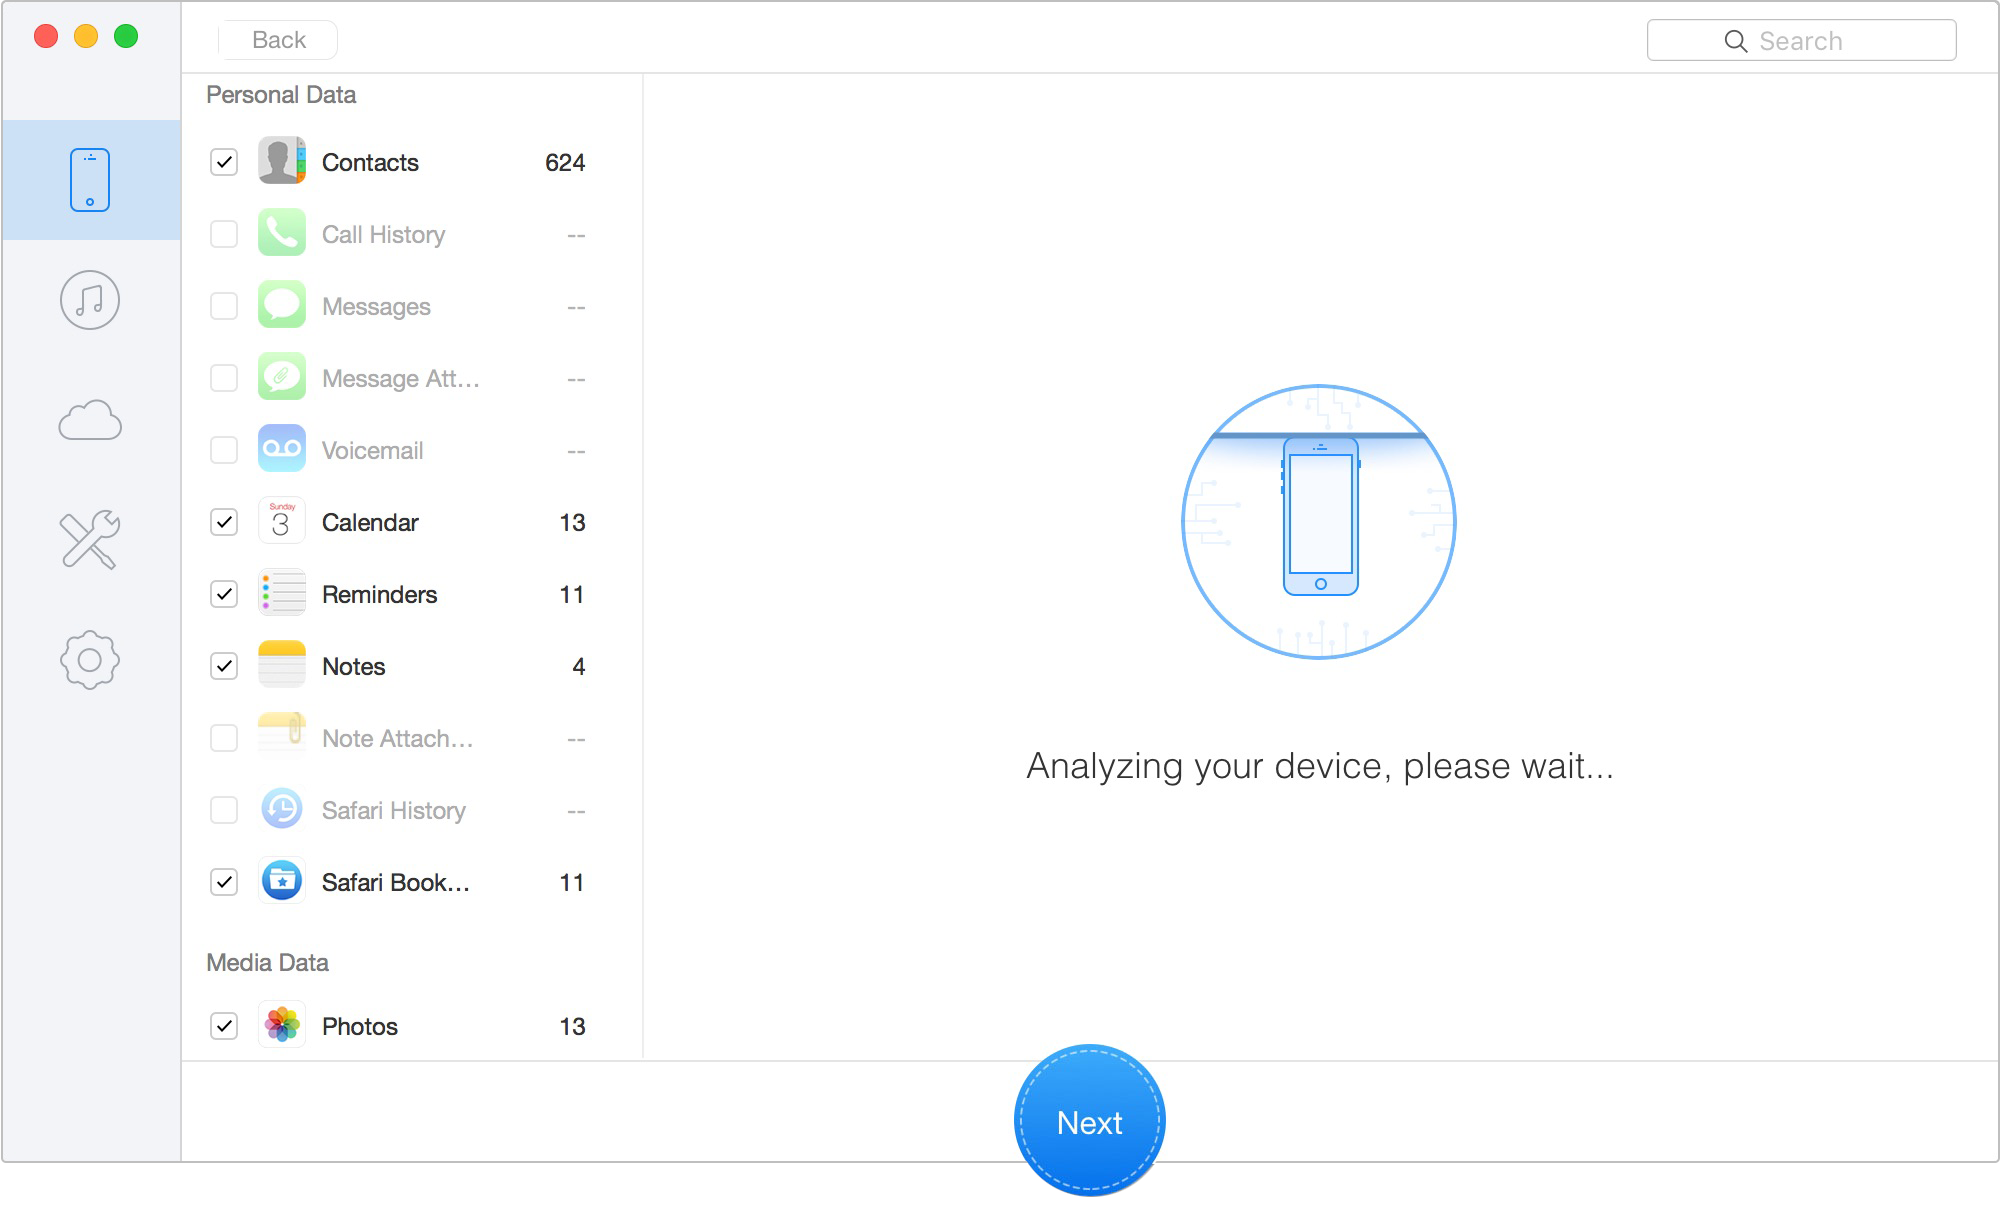
Scan Lost iOS Data on iOS Device
• Navigate to the "Notes" category on the left sidebar to preview your missing data.
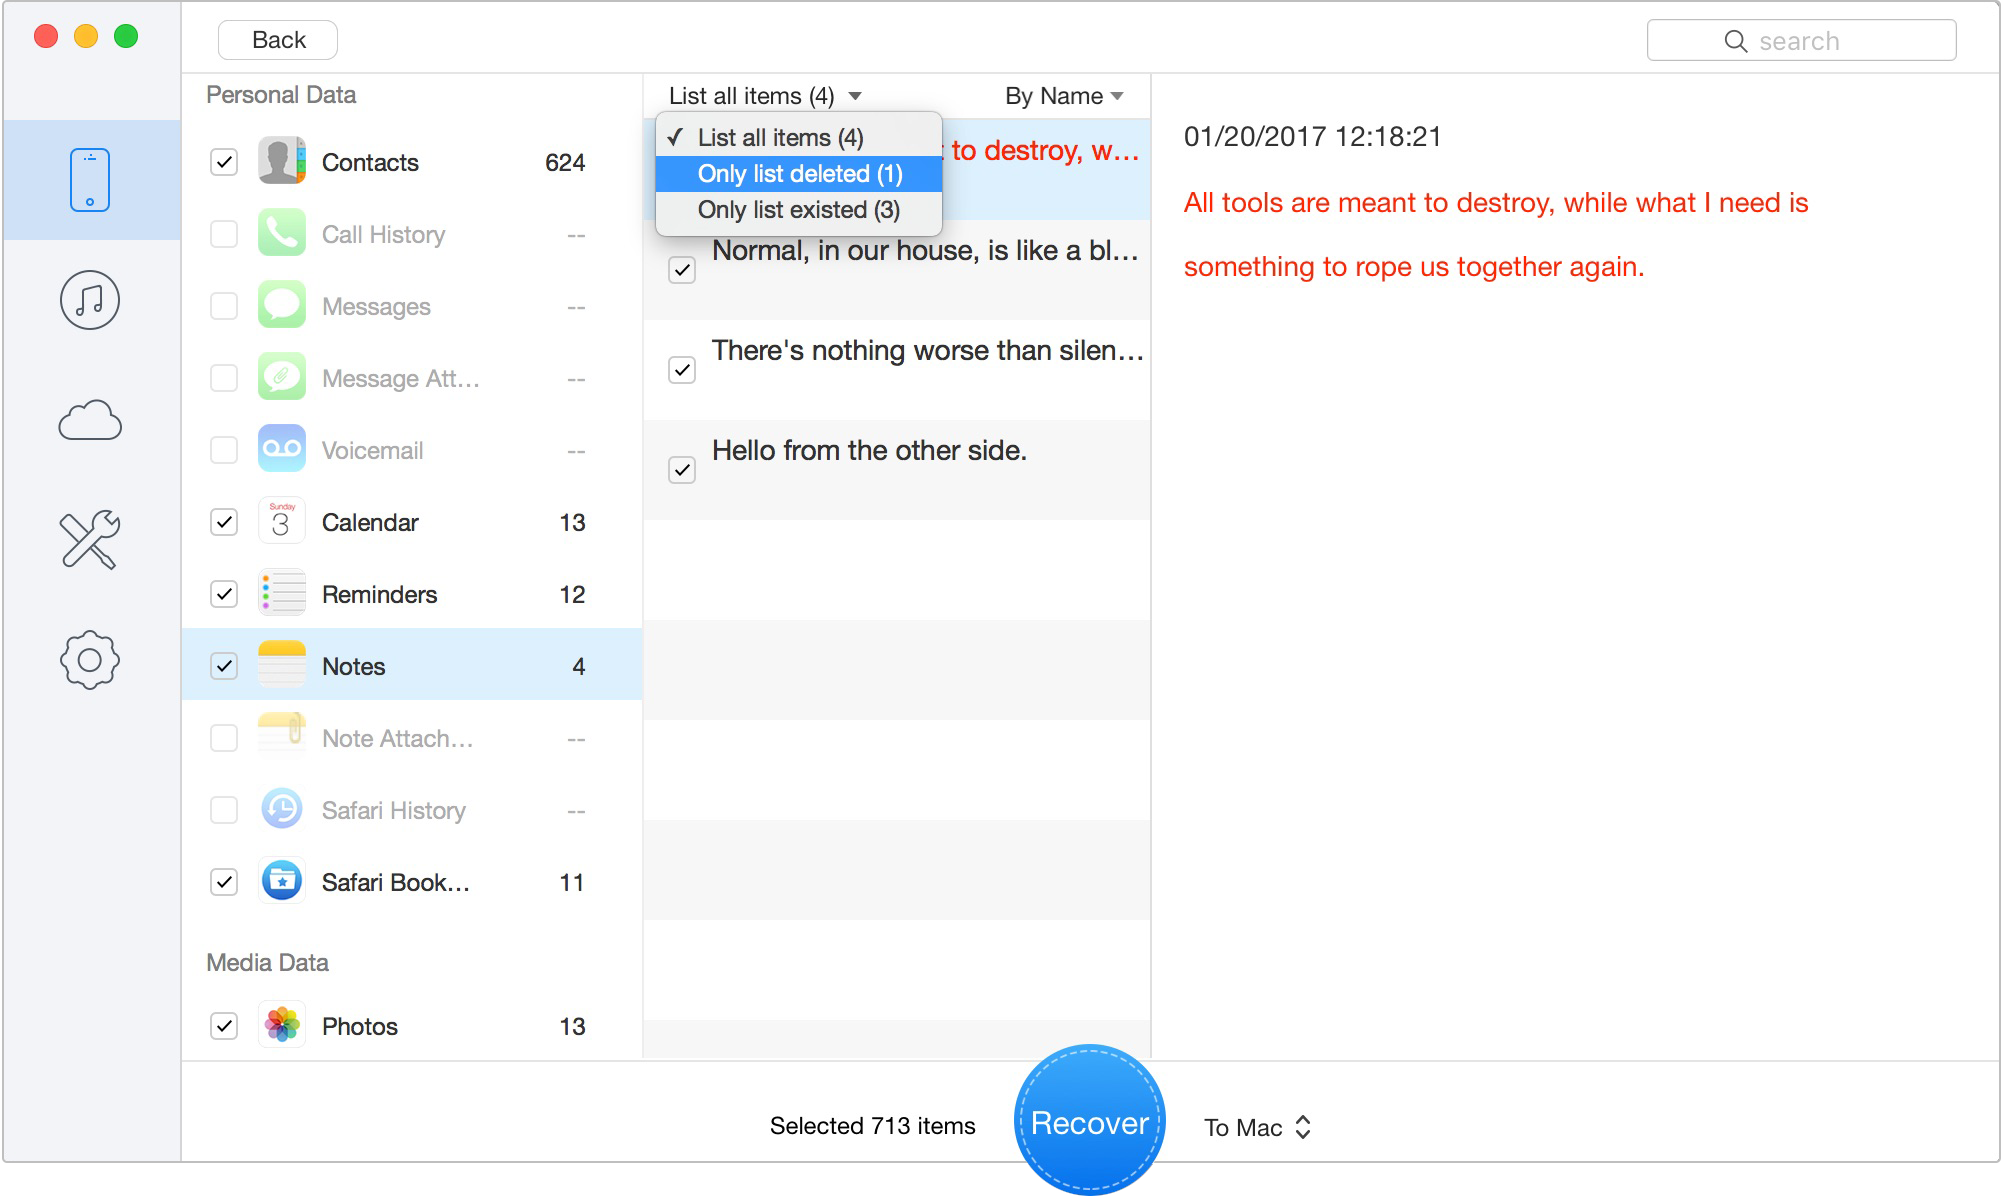
Preview the Scanned iOS Data
• Select the specific lists you wish to save and click "Recover" to export them safely to your computer's hard drive.
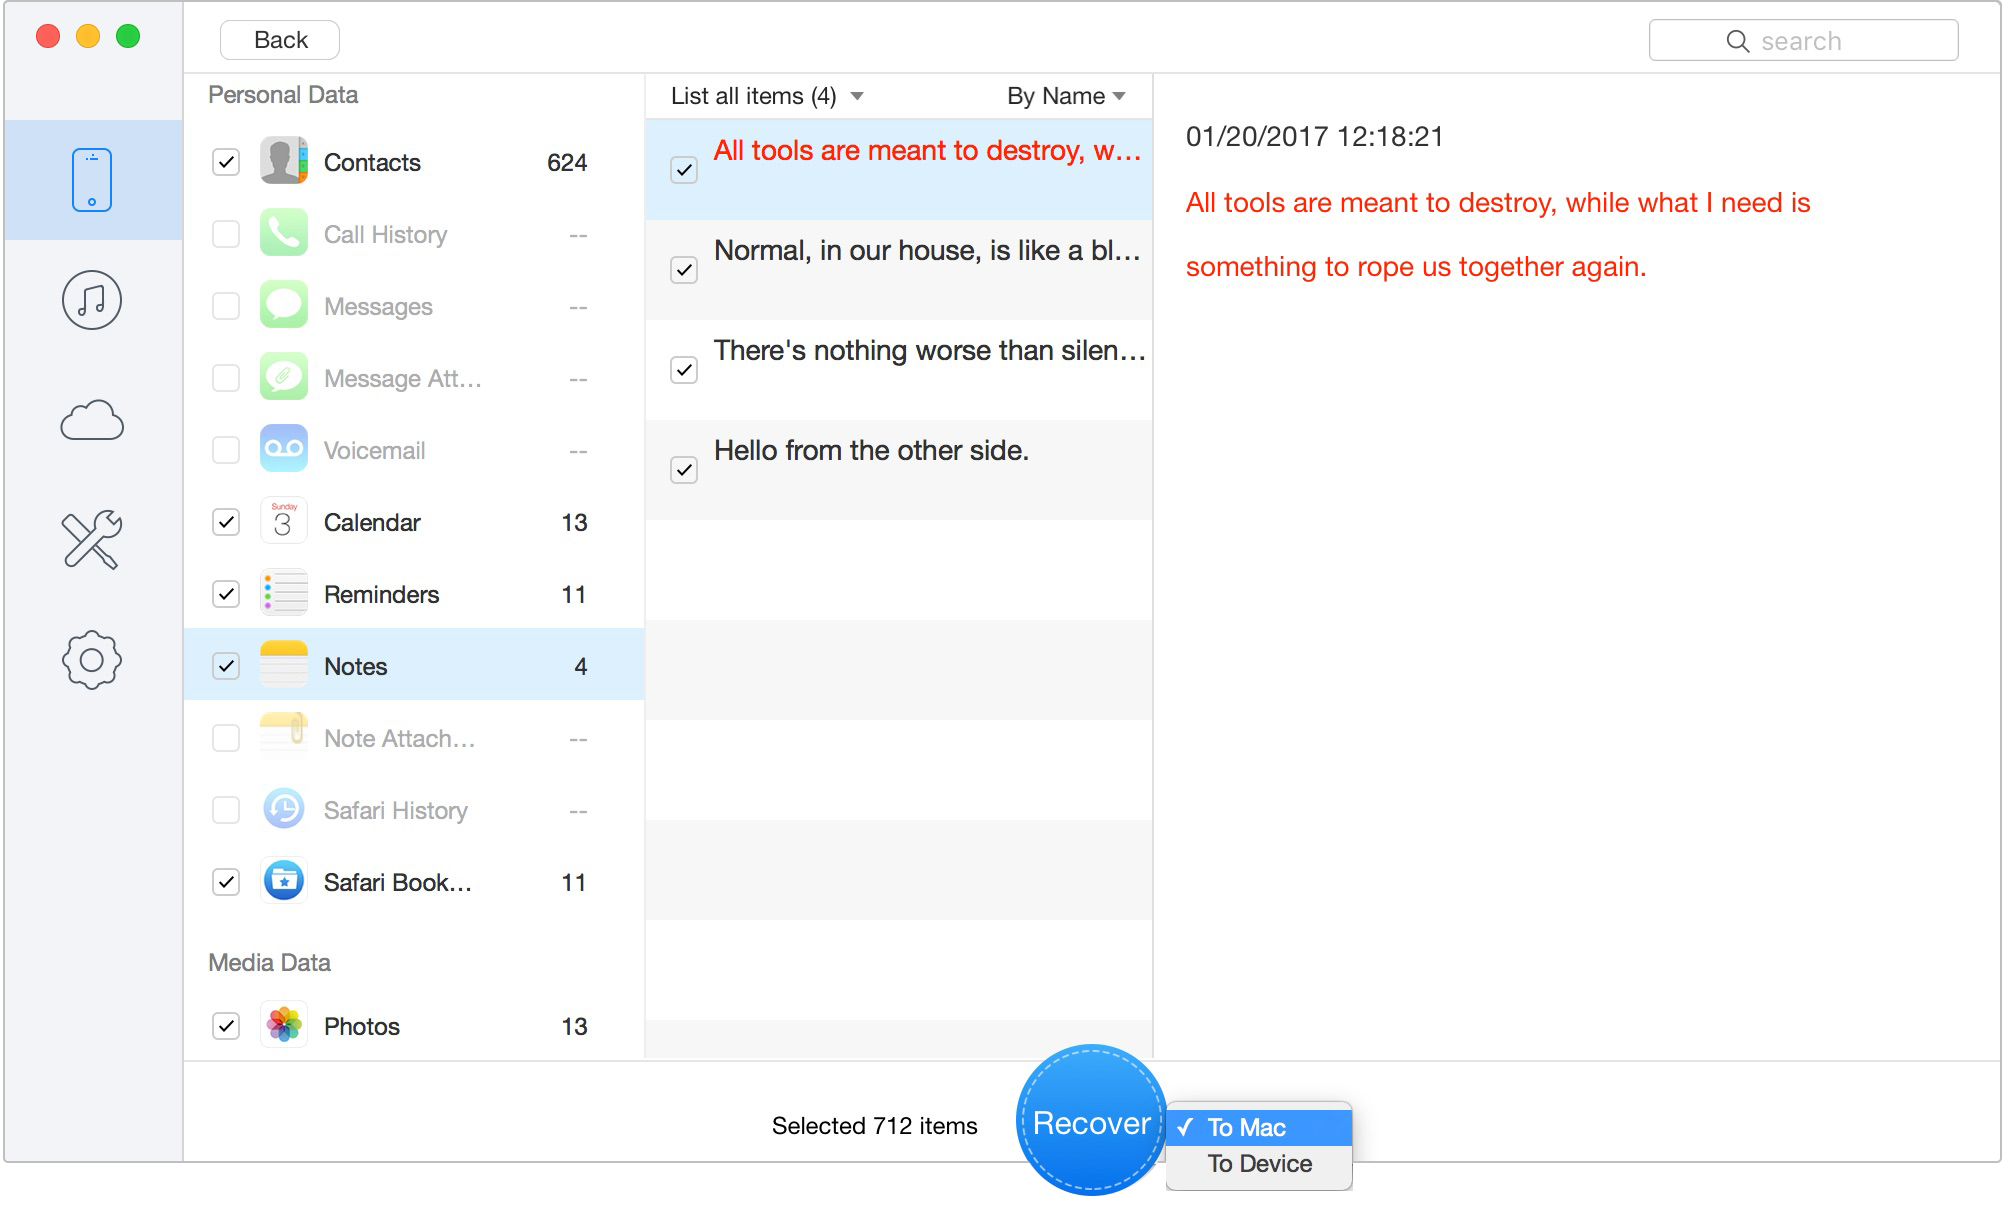
Retrieve Data to Computer or iOS Device
When your data disappears following a software update, it is almost never your fault. Instead, it is usually caused by an automated background change that disrupts where your device looks for its files. Understanding this mechanics helps alleviate the fear that your data is gone forever.
There are two primary reasons this happens:
1. iCloud Terms of Service Updates: Following a major iOS installation, Apple frequently prompts users to accept new terms and conditions. Accepting this prompt can inadvertently trigger a background reset of your iCloud preferences, quietly severing the app's connection to the server.
2. Default Storage Shifts: An update bug can sometimes alter your default storage settings without asking you. Your iPhone might suddenly switch its primary save location from "iCloud" to "On My iPhone". This is also why understanding what iTunes backup saves can help you judge whether local notes or app data may still be recoverable from a computer backup. Because the app is suddenly looking at an empty local folder instead of your populated cloud folder, your lists appear to vanish instantly.
Knowing that these technical shifts are at fault validates that your data is usually just misplaced, not permanently destroyed.
Primo iPhone Data Recovery helps you scan and recover lost iPhone data from iOS devices and backups. Click Here to Free Download
Q1: Why did my iPhone notes vanish after an update?
This typically occurs due to a system glitch that resets your account synchronization settings, or quietly changes your default storage location from the cloud to your local device storage.
Q2: Are my missing notes actually deleted?
Usually, no. They are often just hidden from the main interface because the connection to your primary email or iCloud account was temporarily interrupted during the software update process.
Q3: How do I turn iCloud sync back on?
Navigate to Settings > Notes > Accounts. Select your primary account (like iCloud or Gmail) and ensure the sync toggle next to Notes is switched to the green "on" position. Remember, it is normal to see a temporary deletion warning if you toggle it off to reset the connection.
Q4: Where is the Recently Deleted folder?
Open the app and tap the "Folders" back button in the upper left corner until you see the main directory list. The Recently Deleted folder is located at the very bottom of this list, though it will only appear if there are actually recently deleted items inside it.
Q5: Will restoring an old backup erase my current data?
Yes. Performing a standard Apple backup restore will erase all current data on your device and replace it with the data from the exact date and time the backup was created. This is exactly why we recommend checking iCloud.com or using extraction tools first to avoid losing new photos or messages.
Discovering an empty app when you desperately need your information is incredibly stressful. However, missing folders rarely mean your data is gone forever. By methodically checking your sync toggles, checking iCloud.com, and refreshing your network settings, you can usually resolve the glitch for free. If you've exhausted the built-in methods and want a solution without erasing your iPhone's current data, trusted extraction tools like Primo iPhone Data Recovery offer a safe, reliable final step to preview and rescue your missing files. Take a deep breath, follow the steps above, and take control of your data recovery safely.
Ansel A member of PrimoSync Support Team, passionate for mobile industry and ready to help you with Apple related issues.
Get Up-to-the-minute iPhone Tips & Enjoy Awesome Deals.



Design Simple and Beautiful Software
with Passion & Love

