
 by Ansel on Jul. 22, 2026 | NO COMMENT
I recently plugged my iPhone into my PC, fully expecting a normal sync, only to be greeted by absolute panic. My phone screen looked completely normal—which is what makes this error so incredibly confusing—but iTunes immediately threw up a warning window stating it could not read the contents and that I should restore the device.
The instant panic is real. You are suddenly staring at a screen threatening to nuke your camera roll, leaving you terrified that years of personal data will be wiped out in a single click. I needed my photos and call history first, so I absolutely did not want to press "Restore" blindly.
If you are a user who wants to secure your files before clicking Restore, stop right now.
🚨 URGENT WARNING: DO NOT CLICK RESTORE YET 🚨 Do not click anything on that iTunes prompt. Because you cannot back up through iTunes in this corrupted state, clicking "Restore" will trigger an immediate factory reset, erasing all irreplaceable photos, messages, and app data.
This guide will walk you through the exact, step-by-step procedures to fix this issue—starting with free, official workarounds, and moving to secure data extraction before you ever attempt a risky factory reset. By prioritizing data recovery and smart troubleshooting, you can regain control of your device without sacrificing your personal digital history.
Before downloading any third-party software or taking drastic measures, we need to try genuine hardware and software troubleshooting. Often, a read error is simply the result of a faulty data transfer or a legacy software conflict rather than a corrupted mobile device.
Follow this systematic method to rule out physical and official software faults:
1. Bypass iTunes with Modern Apple Apps
Apple is actively phasing out legacy software like iTunes. If you are on Windows 10 or 11, the absolute best workaround is to download the modern Apple Devices app from the Microsoft Store. If you are on a Mac running macOS Catalina or later, simply connect your device and look for it in Finder.
Often, these modern interfaces can read the file system perfectly without triggering the dreaded read error.
• Crucial Windows Execution Detail: If you decide to download the Apple Devices app on a PC, you must completely close iTunes (make sure you right-click and exit it in your Windows System Tray in the bottom right corner) to prevent background USB driver conflicts. For the cleanest result, uninstalling iTunes entirely before using the Apple Devices app is highly recommended.
2. Inspect the Physical Connection
A damaged Lightning or USB-C cable might still charge the device but fail to transmit data properly. Always test the connection with a secondary, unfrayed, Apple-certified USB cable.
3. Use a Direct Motherboard Port
Front-panel USB hubs on desktop computers frequently suffer from minor voltage drops, which can easily disrupt secure data handshakes. Plug your device directly into a USB port on the back of the machine, straight into the motherboard.

Primo iPhone Data Recovery helps you scan and recover lost iPhone data from iOS devices and backups. Click Here to Free Download
When a cable swap fails to resolve the issue and the modern Apple Devices app still can't connect, a frequent culprit on Windows machines is a corrupted background driver. The Apple Mobile Device Support component might be failing to communicate correctly with the operating system.
Here is the precise procedure to completely refresh the driver on a Windows PC:
• Disconnect your iOS device from the computer completely and ensure all Apple software (iTunes, Apple Devices) is closed.
• Reconnect the device via USB. If iTunes opens automatically, close it again.
• Right-click the Windows Start button and select Device Manager from the context menu.
• Scroll down and expand the Universal Serial Bus devices (or Portable Devices) section.
• Locate the Apple Mobile Device USB Driver.
• Right-click the driver and choose Uninstall device. Important: If prompted, ensure you check the box that says "Delete the driver software for this device."
• Restart your PC. Once the computer has fully rebooted, reconnect your unlocked phone. Windows will automatically fetch and reinstall a fresh version of the driver.
If you have tried the new Apple Devices app, swapped your cables, and updated your drivers, but you are still getting locked out, your iTunes/iOS communication is fundamentally broken. At this stage, a factory reset is likely your only path forward.
However, since you cannot back up through normal methods, you must extract your data manually before clicking that Restore button. If your data may still exist inside a local backup, this guide to an iPhone backup extractor explains how previewing backup content can help before a full restore. The most effective method for this specific emergency is using Primo iPhone Data Recovery.
A Note on Transparency: Primo is a premium software tool. It offers a free trial that allows you to safely scan your device and preview your photos, messages, and call logs to prove they are still intact. However, you will need to pay for a license (typically around $40) to actually extract and save those files to your computer. When your irreplaceable memories are on the line and Apple's free tools fail, this read-only software is often worth the investment.

Designed to fit effortlessly into your iPhone data recovery.
Download Now• Prevent Conflicts: Before opening Primo, make absolutely sure iTunes is completely closed. Check your Windows System Tray to ensure it isn't running in the background, so the two programs don't fight over the USB connection.
• Connect and Trust: Open the Primo software and connect your phone. Your iPhone screen will likely wake up. You must enter your passcode on the phone screen and tap "Trust This Computer" if prompted.
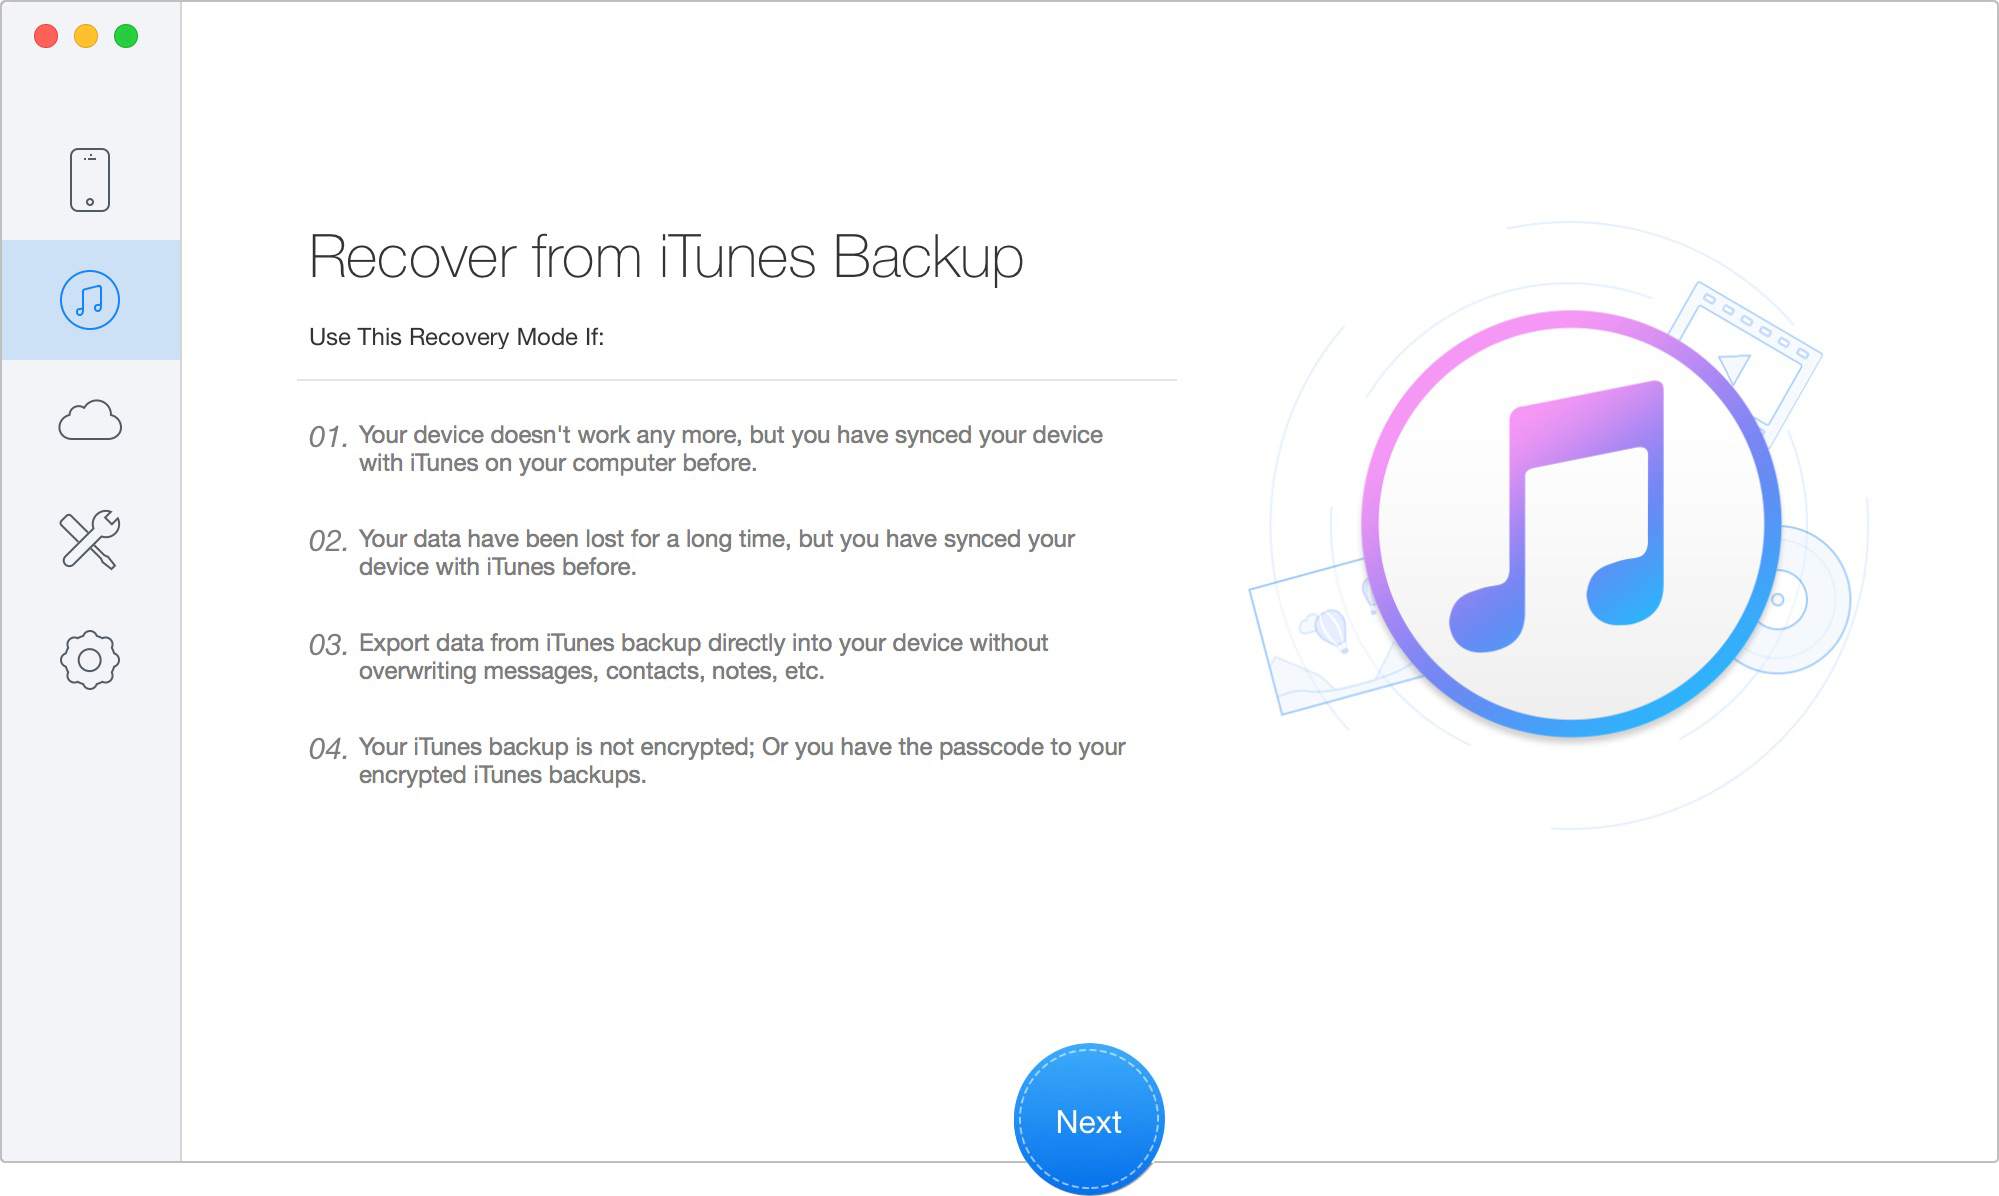
Recover Data from iTunes Backup
• Scan the Storage: Follow the on-screen prompts to run a diagnostic scan. Primo operates independently of Apple's ecosystem, allowing it to bypass the mounting error.
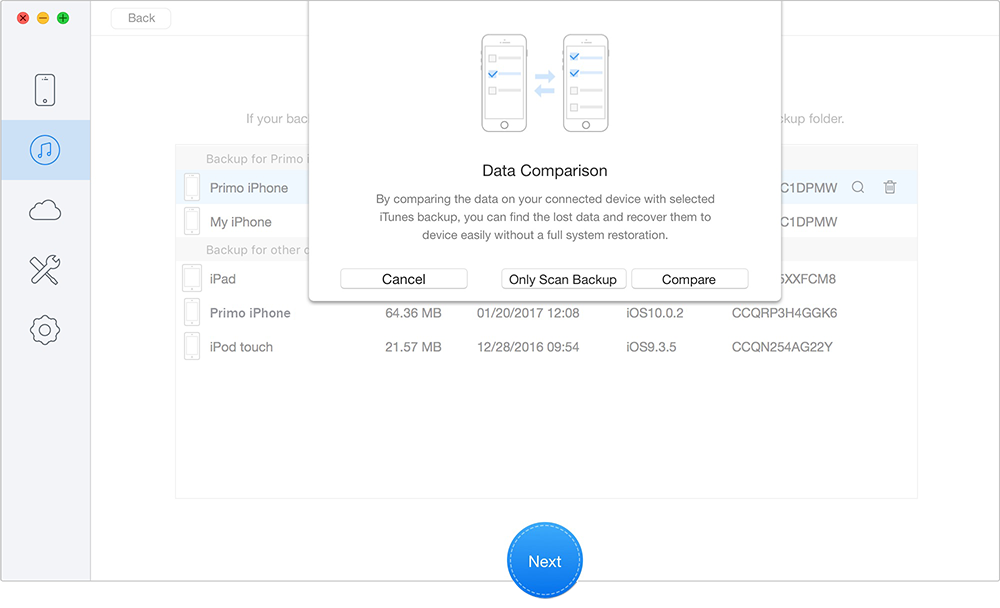
Scan Lost Data from iTunes Backup
• Preview and Save: Once the scan finishes, you will see a visual preview of your files. Select your vital photos, contacts, and call logs, and extract them to a dedicated folder on your computer's desktop.
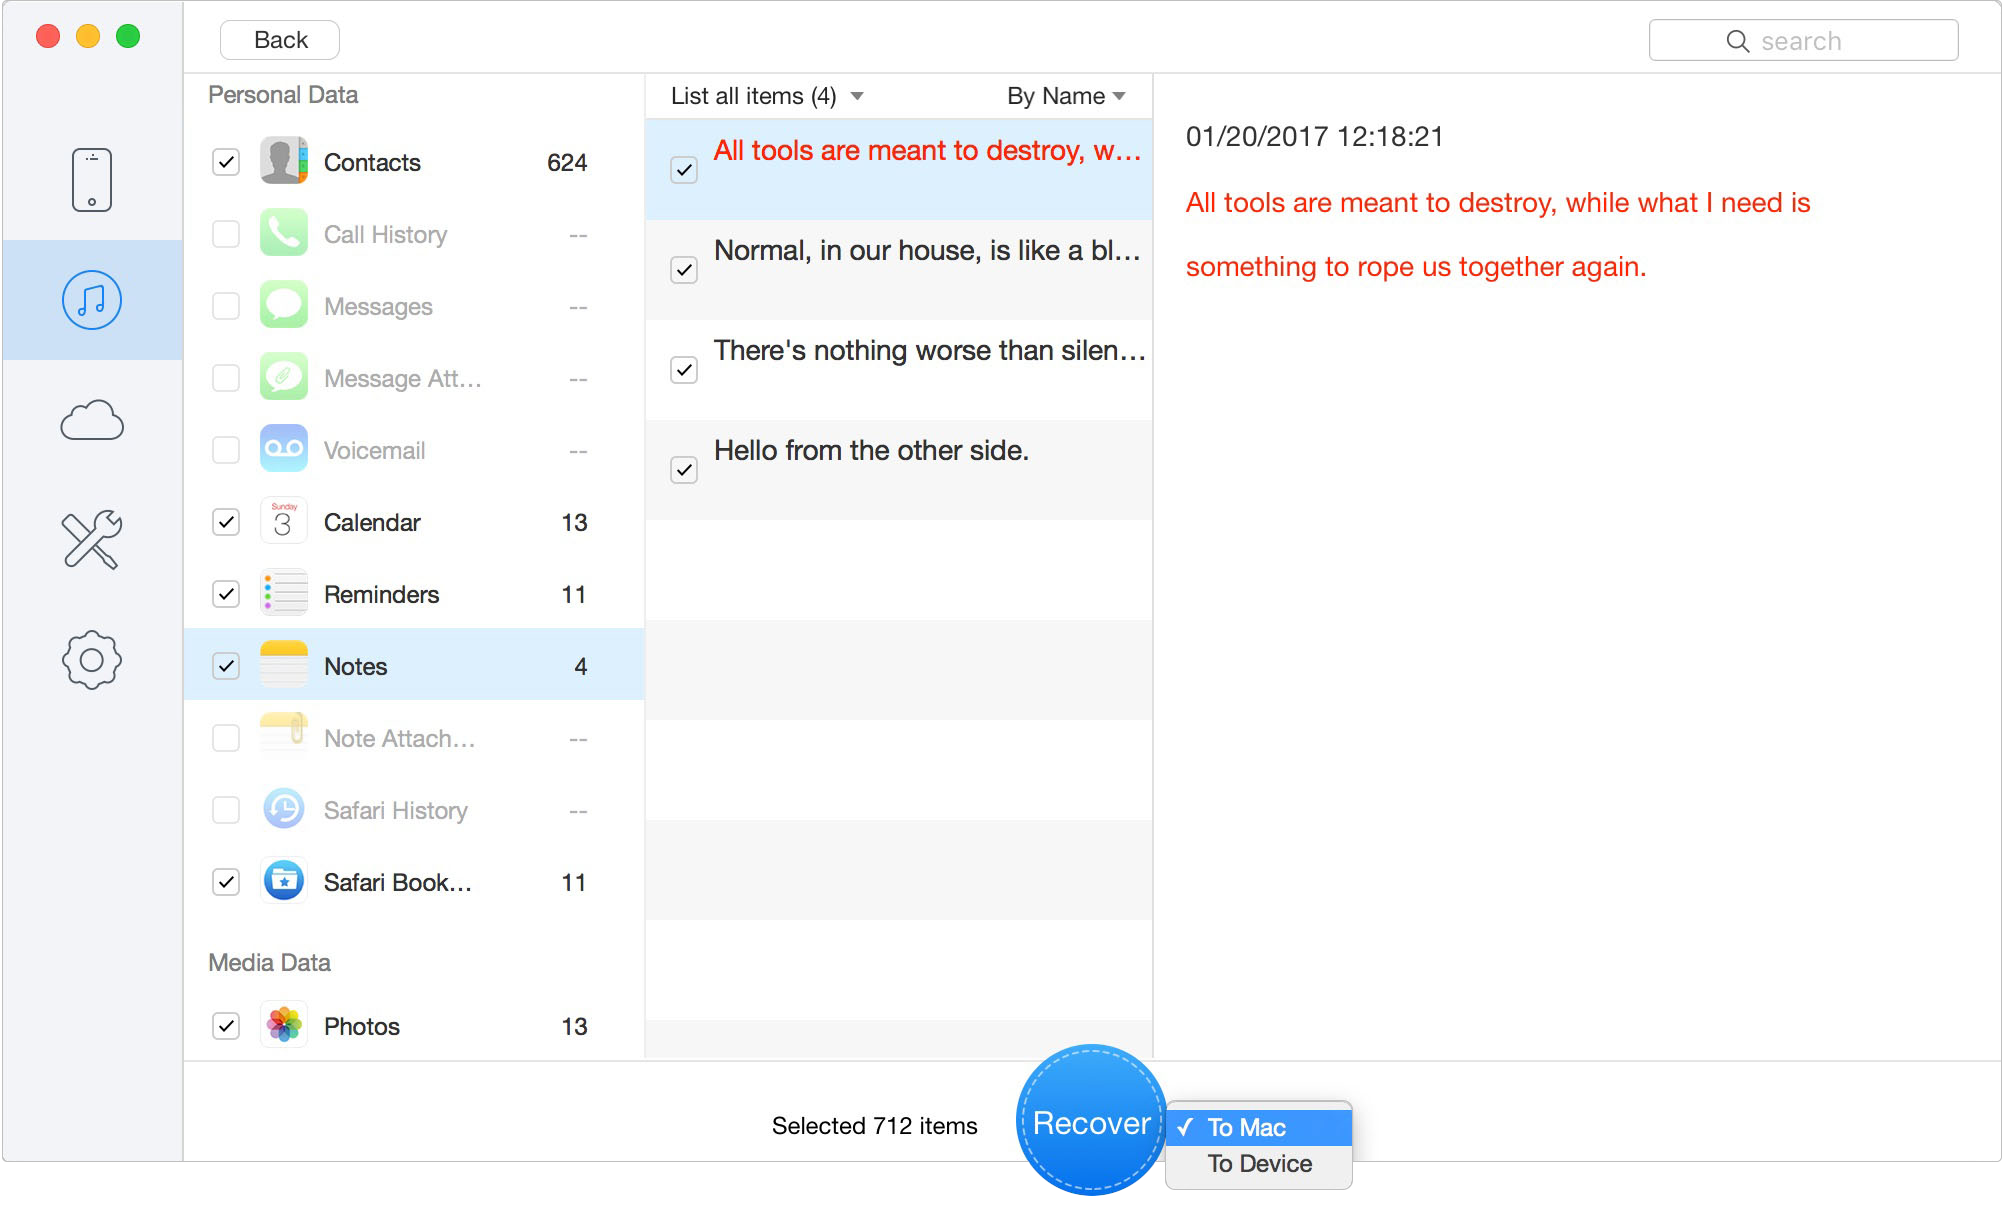
Recover Data to Computer or iOS Device
To quickly summarize how to navigate your options, here is a breakdown of the free fixes versus utilizing an emergency extraction tool:
| Evaluation Criteria | 1. Official Troubleshooting (Try First) | 2. Data Extraction Software (Emergency Plan) |
| Primary Action | Cable swaps, driver updates, using Finder/Apple Devices App | Using read-only third-party tools to bypass the lock |
| Financial Cost | Free | Paid (Free to scan, paid to extract) |
| Technical Skill | Moderate (Requires driver management) | Low (Step-by-step visual interface) |
| Primary Goal | Fix the root cause to allow a normal backup | Secure files to PC immediately before a forced Restore |
Primo iPhone Data Recovery helps you scan and recover lost iPhone data from iOS devices and backups. Click Here to Free Download
Once you have successfully extracted your photos, texts, and vital data to a desktop folder—or if you simply have nothing on the device you care to save—the panic is officially over. You can now safely address the core software corruption.
1. Understand the Action: Clicking the "Restore" button will indeed erase all content and settings on your device, reinstalling a fresh, factory-default copy of iOS.
2. Look for the "Update" Option: Occasionally, the prompt may offer an "Update" option alongside "Restore." Always try the Update procedure first. This option attempts to reinstall the underlying operating system files without erasing user data. If your device is already trapped in a recovery screen during this process, this guide on iPhone stuck in recovery mode can help you understand the next safe step.
3. Proceed with Confidence: If the Update method fails or is entirely unavailable, accept the restore prompt. Let the software completely format the device.
Once the process completes, your device will reboot as if it were brand new, entirely free of the previous file system errors. You can then begin transferring your successfully rescued files back onto the clean device.
It is entirely normal to wonder exactly what went wrong under the hood, especially when your phone screen looks perfectly normal while your computer panics. At its core, this is a communication breakdown. There are three primary triggers:
1. The "Trust" Handshake Failure: When you connect your device, a secure digital handshake occurs. If a minor glitch disrupts this, the computer perceives the phone as an unformatted, unreadable storage drive rather than a trusted mobile device.
2. Corrupted Backup Index: iTunes maintains local index files of your previous synchronization sessions. If a previous sync was abruptly interrupted, the database fails to parse upon the next connection. It defaults to demanding a factory reset to build a clean index.
3. Severe Software Mismatch: A significant mismatch between a brand-new iOS version and an ancient desktop application (or legacy driver) can cause the system to misinterpret the data structure entirely. Similar iTunes communication failures may also lead to update or restore errors, so users can review iTunes error 4013 and 4014 if they see those codes during repair.
In almost all these scenarios, the physical memory chips inside your device are perfectly intact—the software just refuses to look at them properly.
Q1: Why does iTunes say it cannot read the contents of my iPhone?
This happens due to a communication breakdown between your computer and phone. It's most frequently caused by an outdated Apple Mobile Device driver, a damaged USB cable, or a corrupted sync history file on your computer.
Q2: Will clicking Restore erase my iPhone?
Yes. Accepting the restore prompt performs a complete factory reset. It wipes all photos, applications, and settings from the device. This is why you must extract your files or attempt to use the modern Apple Devices app before clicking that button.
Q3: Is there a way to fix this issue without losing data?
Yes. You should first try closing iTunes and opening the "Apple Devices" app on Windows, or "Finder" on Mac. If those official apps still give you an error, you can use specialized third-party data extraction software to pull your files safely to a computer before you perform the required factory reset.
Q4: Do I need to uninstall iTunes to use the Apple Devices app?
On Windows 10 and 11, it is highly recommended. At the very least, you must force-close iTunes from your System Tray. If both programs run simultaneously, they will fight over the background USB drivers, preventing the phone from connecting properly.
Encountering a warning that your phone's contents cannot be read is a terrifying experience, especially when the only option presented to you is a total erasure. But by stopping, taking a breath, and addressing the problem methodically, you can regain control.
Always start with the free, physical troubleshooting: swap your cables, try a direct motherboard port, and ditch legacy iTunes for modern alternatives like Finder or the Apple Devices app. If those steps fail, remember that a prompt to restore does not mean your digital life is gone forever. Tools like Primo iPhone Data Recovery exist specifically to empower you to rescue your files when Apple's ecosystem locks you out. Do not let a software glitch hold your memories hostage—secure your data first, and then proceed with fixing your device with absolute peace of mind.
Ansel A member of PrimoSync Support Team, passionate for mobile industry and ready to help you with Apple related issues.
Get Up-to-the-minute iPhone Tips & Enjoy Awesome Deals.



Design Simple and Beautiful Software
with Passion & Love

