Get a new iPhone X or iPhone 8 and want to transfer some ringtones from the old iPhone to the new one? This post will show you how to transfer ringtones from iPhone to iPhone with or without iTunes.

Don't have PrimoMusic? Download it now prior to reading this guide and it will save you quite a lot of time. Click Here to Free Download
Every iPhone features a number of default ringtones. However, in order to be different from others, you may have added some customized ringtones to your iPhone. When you update from your old iPhone to a new one, like iPhone X or iPhone 8 (Plus), you may want to transfer your favorite ringtones to the new iPhone immediately.
You may like: How to Transfer Pictures from iPhone to iPhone X/8/7/6s >
If you purchase ringtones from iTunes store, you can use iTunes to transfer these ringtones from iPhone to iPhone, but this is only limited to iTunes 12.7 earlier for iTunes 12.7 has removed the Tones option.
If you are using iTunes 12.7, or these ringtones are non-purchased, you need a professional ringtone transfer tool, like PrimoMusic. In this article, we will introduce the how to transfer ringtones from iPhone to new iPhone with or without iTunes.
When it comes to transferring ringtones from iPhone to iPhone, iTunes provides a simple way that you can use “Transfer Purchases” function to transfer purchased ringtones from the old iPhone to iTunes and then sync these ringtones to another iPhone. Keep in mind that iTunes only allows you to transfer purchased ringtones and the customized ringtones can’t be returned back. If you want to transfer ringtones from iPhone to iPhone with iTunes, just follow the steps below.
Step 1. Run iTunes on your computer > Click Edit – Preference – Device – Prevent iPods, iPhones and iPads from syncing automatically.

How to Transfer Ringtones from iPhone to iPhone with iTunes – Step 1
Step 2. Connect your old iPhone to the computer with a USB cable > Click File – Device – Transfer Purchases > Click Apply.
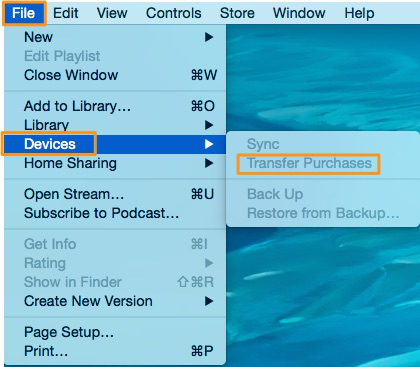
How to Transfer Ringtones from iPhone to iPhone with iTunes – Step 2
Step 3. Disconnect your old iPhone > Connect your new iPhone to the computer > Click iPhone icon > Click Tones > Sync Tones > Click All tones or Selected tones > Click Apply to transfer ringtones from iPhone to iPhone with the help of iTunes.
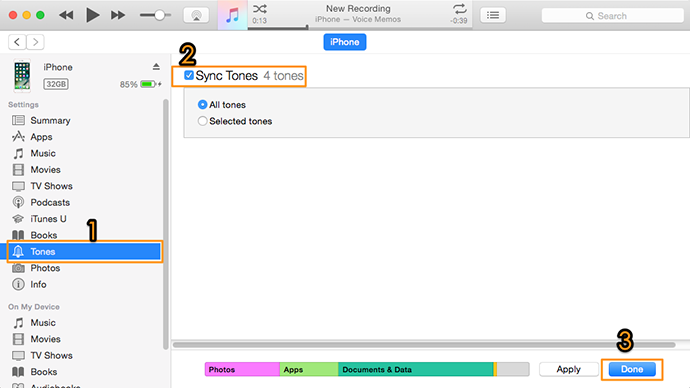
How to Transfer Ringtones from iPhone to iPhone with iTunes – Step 3
If you not only need to transfer purchased ringtones but also want to transfer customized but not purchased ringtones from iPhone to iPhone, it’s suggested to try PrimoMusic – a comprehensive and secure music transfer tool. No matter the ringtones is purchased or non-purchased, PrimoMusic can help you to transfer ringtones from iPhone to iPhone only with a few clicks. Besides ringtones, it also manages music, videos, voice memos, audiobooks and more on iPhone. Just check the following tutorial.
Step 1. Download and install PrimoMusic on your computer > Plug your old iPhone into the computer > Open PrimoMusic.
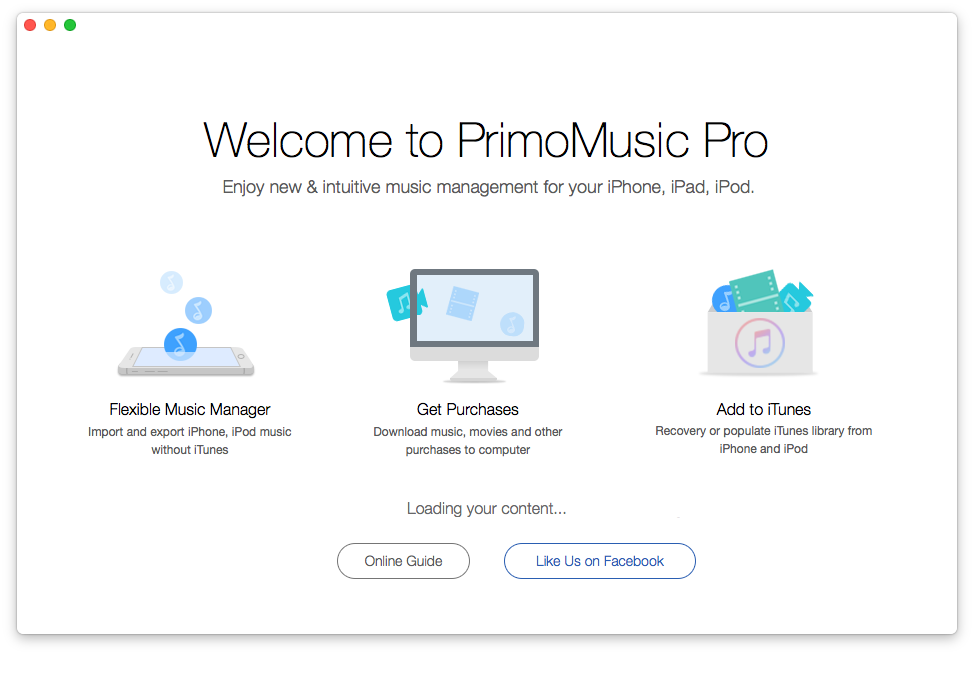
How to Transfer Ringtones from iPhone to iPhone without iTunes – Step 1
Step 2. Click Export To Mac > Click Ringtones > Choose the ringtones you want to transfer > Click Export to transfer these ringtones to your computer.
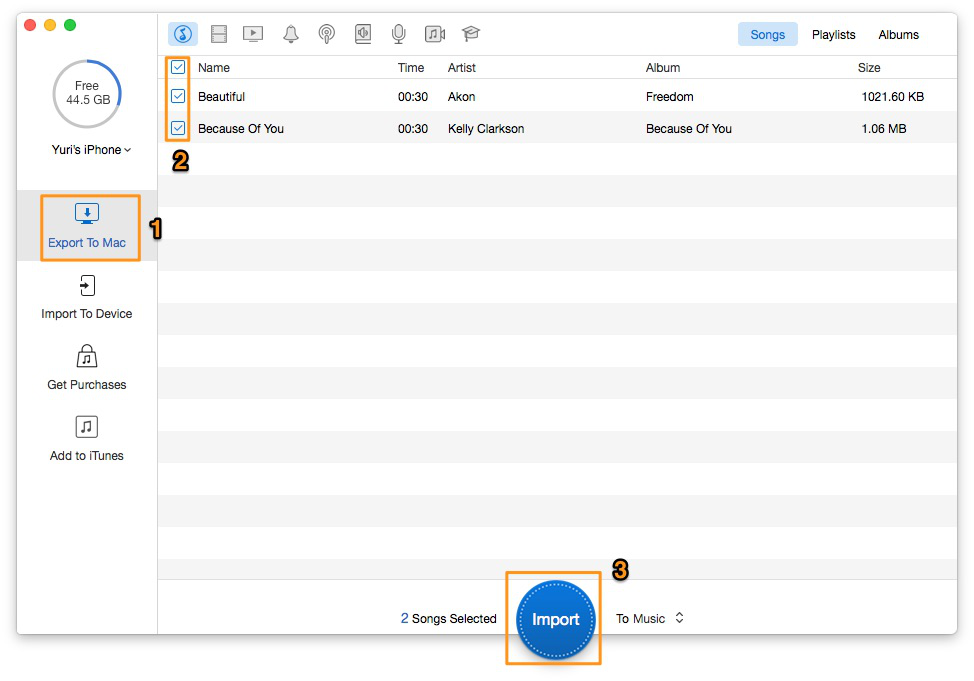
How to Transfer Ringtones from iPhone to iPhone without iTunes – Step 2
Step 3. Disconnect your old iPhone > Connect your new iPhone > Click Import To Device > Add your ringtones from a folder.
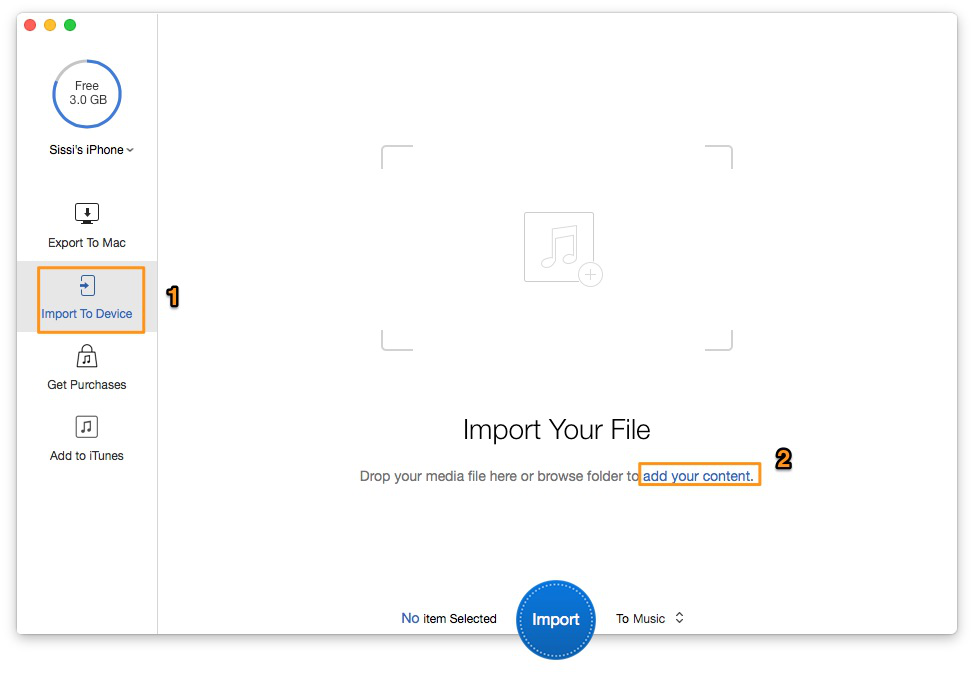
How to Transfer Ringtones from iPhone to iPhone without iTunes – Step 3
Step 4. Choose your desired ringtones > Click Import button to transfer ringtones from iPhone to iPhone.
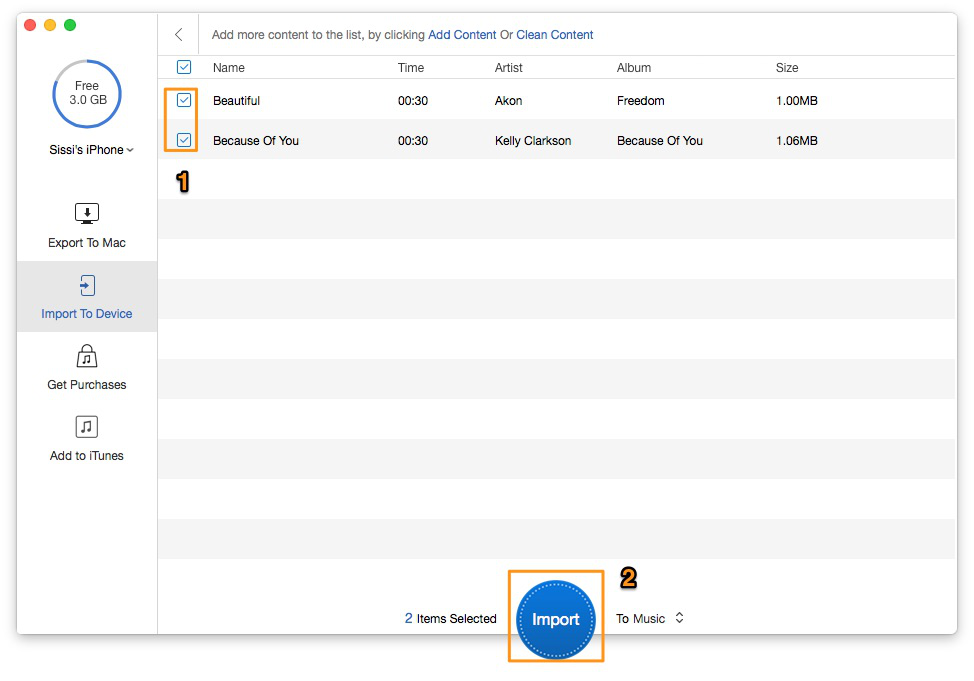
How to Transfer Ringtones from iPhone to iPhone without iTunes – Step 4

Designed to fit effortlessly into your iPhone photo management
Download NowWith the two effortless ways, you can transfer ringtones from iPhone to iPhone and just choose the suitable means. If you want to get the simple and quick method to transfer music, TV shows, ringtones or podcasts between iOS devices and computer, PrimoMusic is your prior choice. Download PrimoMusic to have a try now.

SissiA member of @PrimoSync team, love to go travelling and share some easy-to-follow tips about Apple related issues.