Here is a comprehensive online guide for Primo iPhone Data Recovery. With the tutorials below you will find out how to recover lost iOS data on iDevice directly, from iTunes backup and from iCloud. If you still cannot find your question below, just feel free to contact our Support Team, and our staff will reply within 24 hours.
Scanning directly from DFU mode is a time saving process, which also supports to scan more data than the normal mode. Currently, Recover from DFU mode only supports iPhone 4/3GS, iPad 1 and iPod touch 4. Please refer to the detailed guide to recover data from DFU mode.
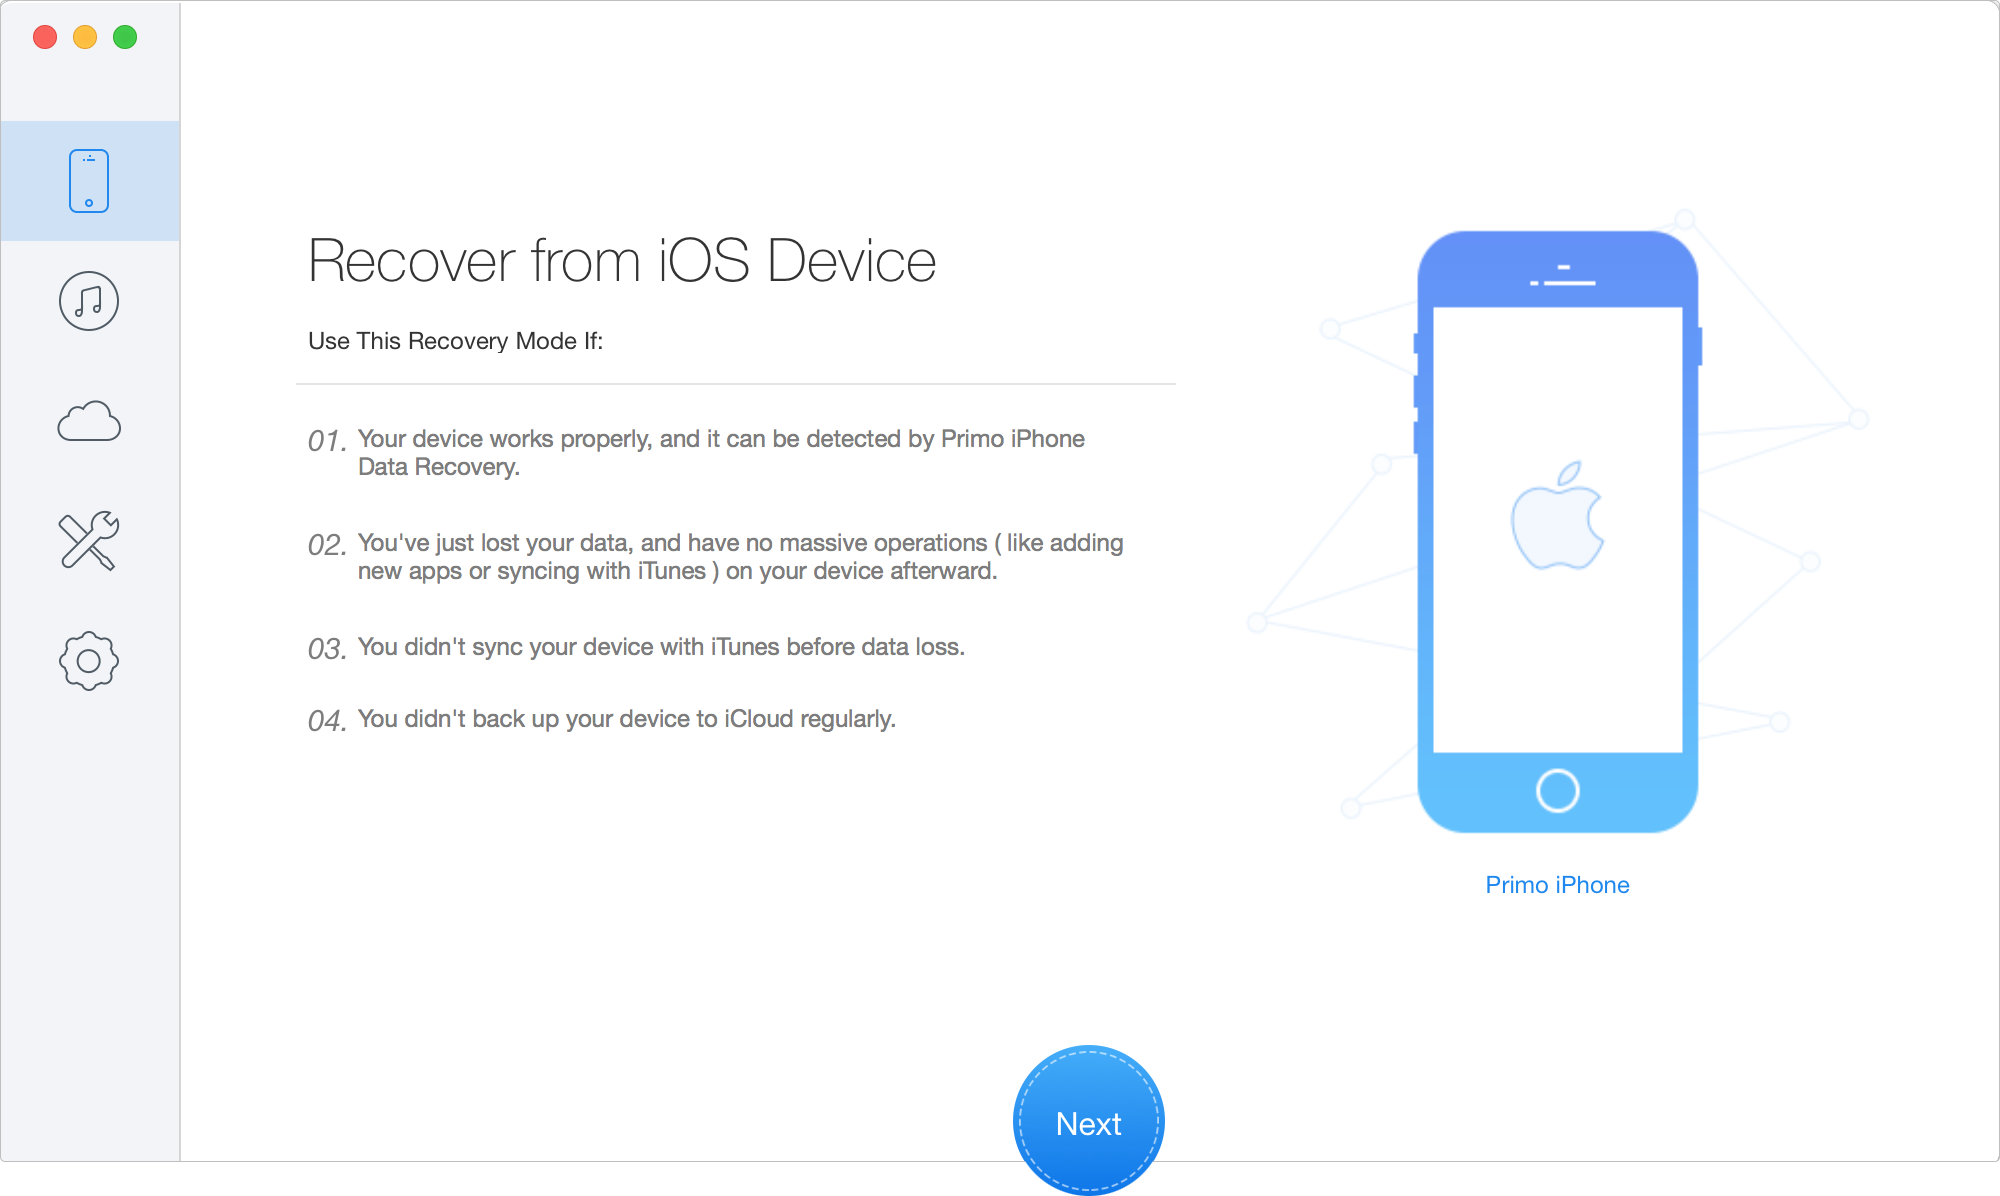
Launch Primo iPhone Data Recovery on your computer and then connect your iOS device to computer with the USB cable. Then, please click  button on the upper left menu on the interface and click the
  button to continue.
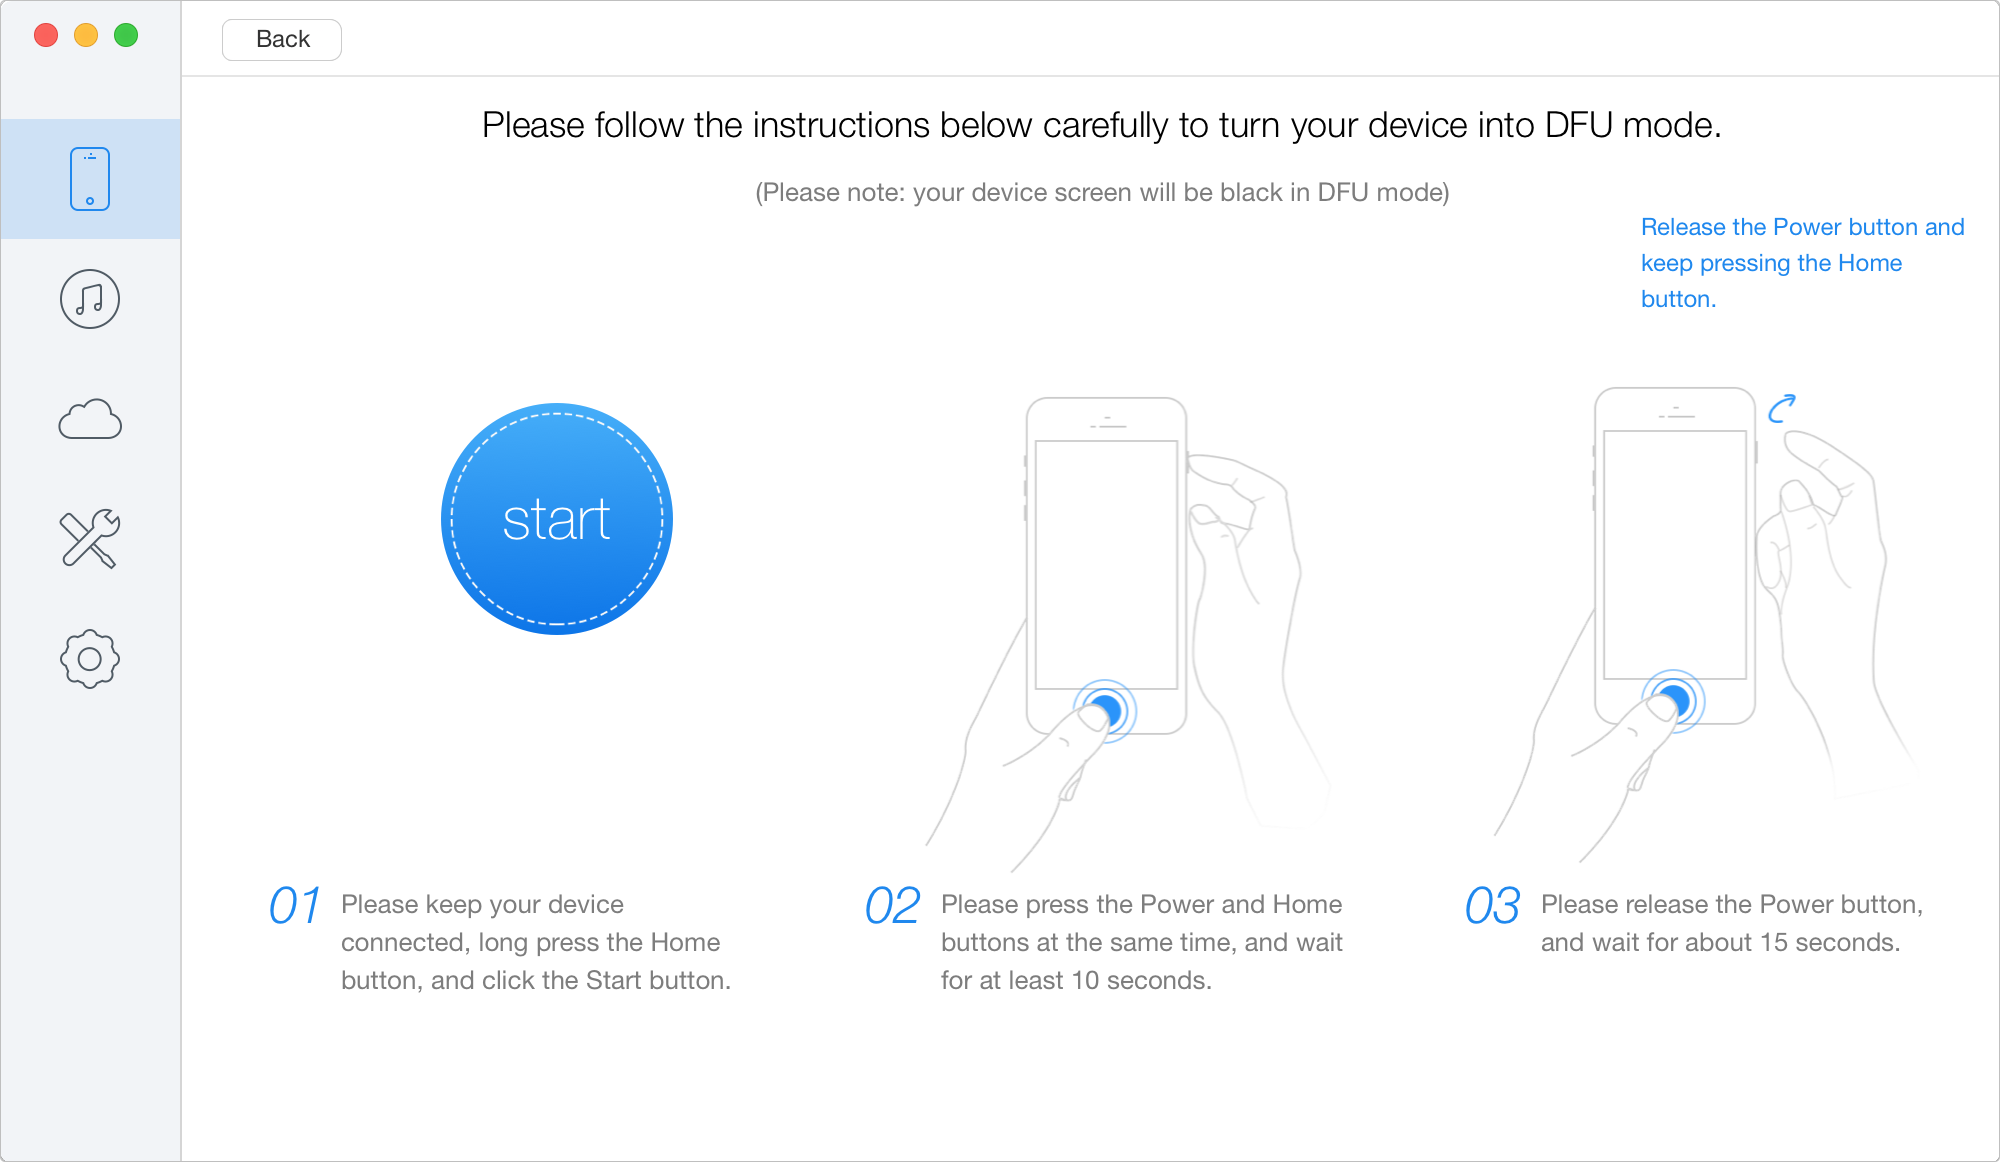
After clicking button, two recovery modes will be listed on the page. Click "Recover Data from DFU Mode", and then wait for the installation of the firmware. After that, enter the DFU mode according to the instructions.
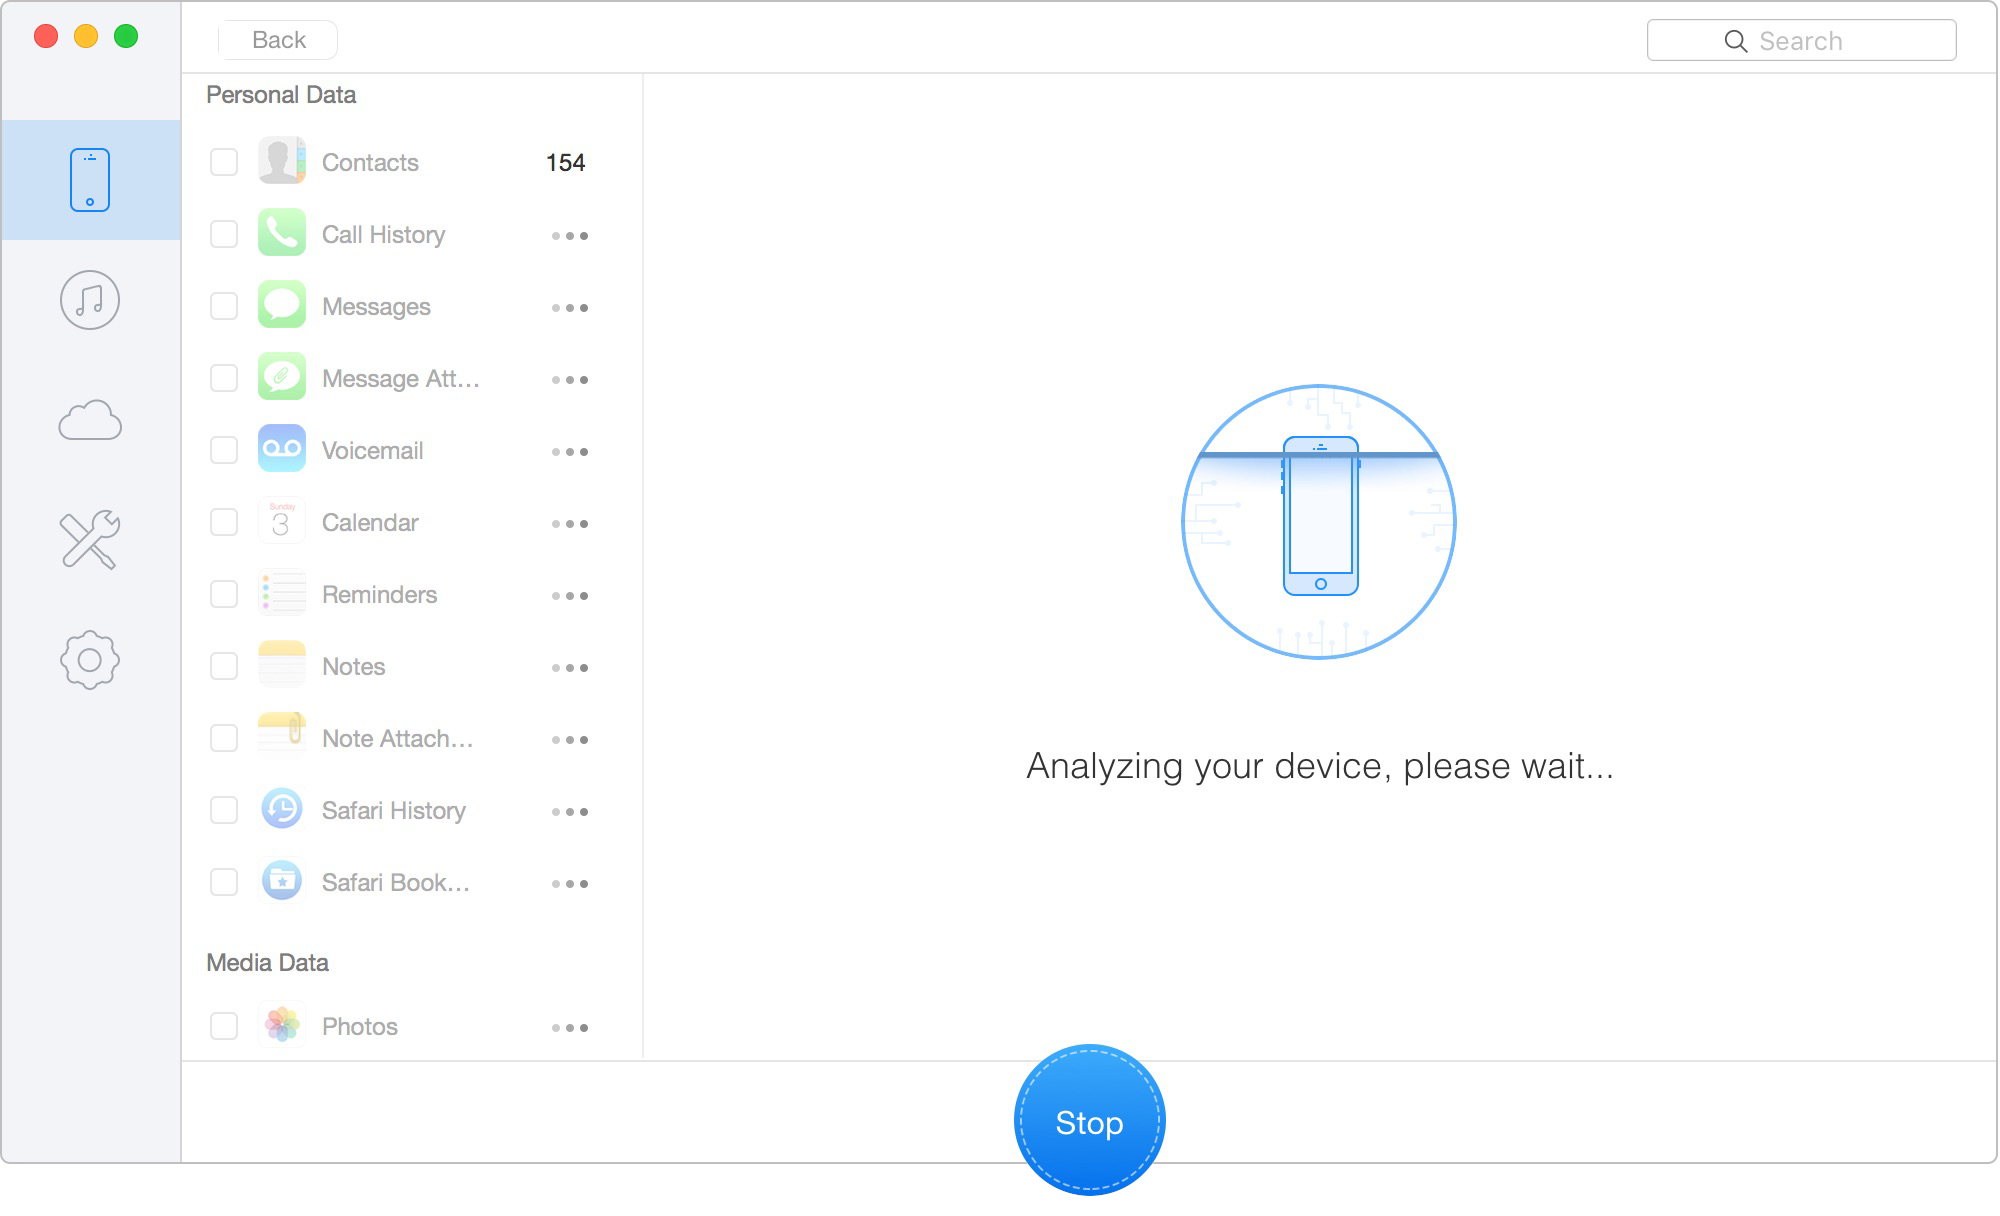
After entering into DFU mode, Primo iPhone Data Recovery will scan data on your device automatically. The process may take several minutes based on the size of your data.
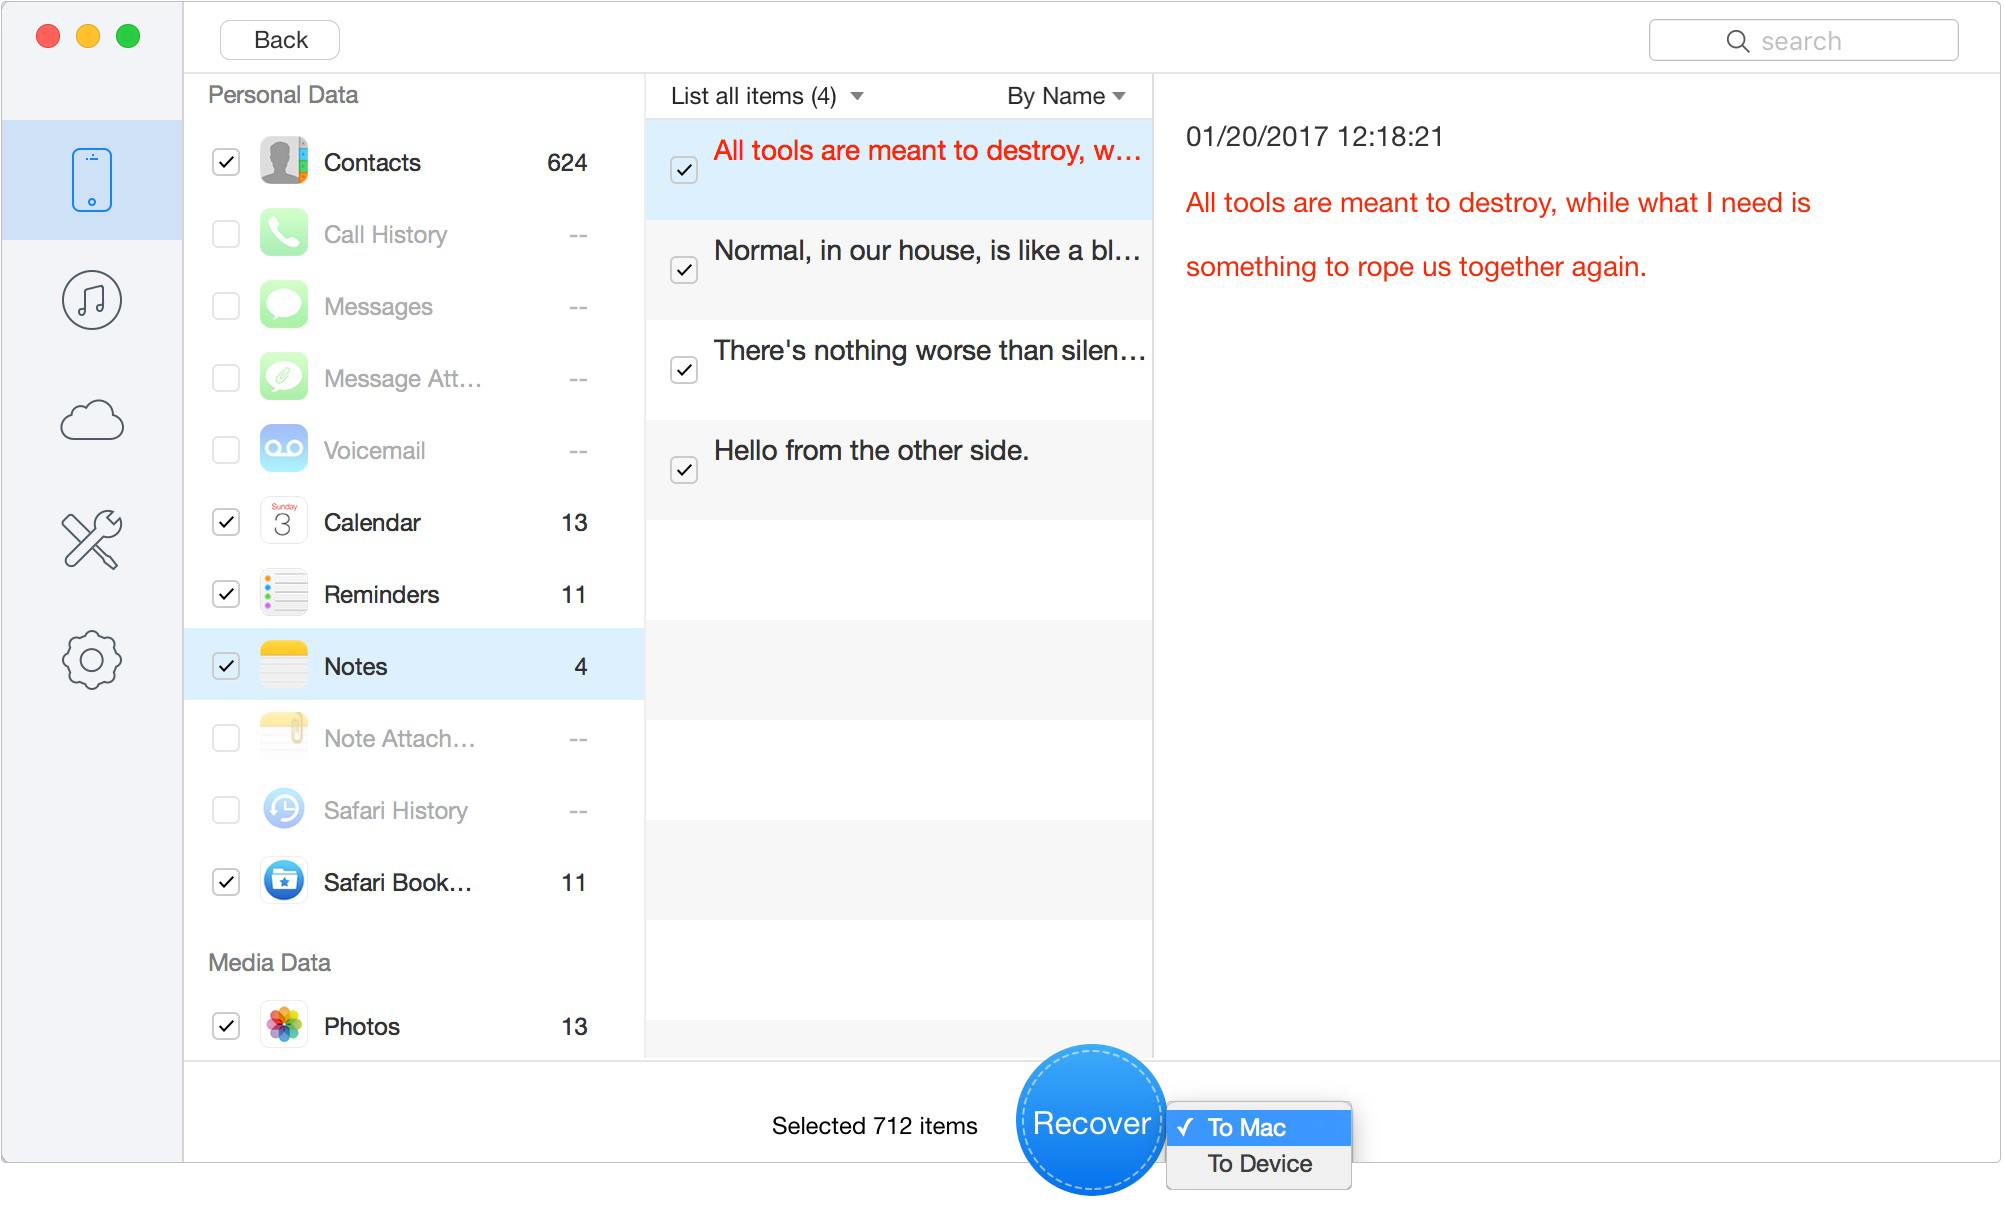
Once the analyzing and scanning process is completed, you can preview the scan result. Primo iPhone Data Recovery displays both existing and deleted data by category. To filter the existing data, you can switch from "List all items" to "Only list deleted". Clicking on the file category from the list, you will be able to preview detailed content of the recovered data. You can also search for desired data by inputting key words in the Search Box.
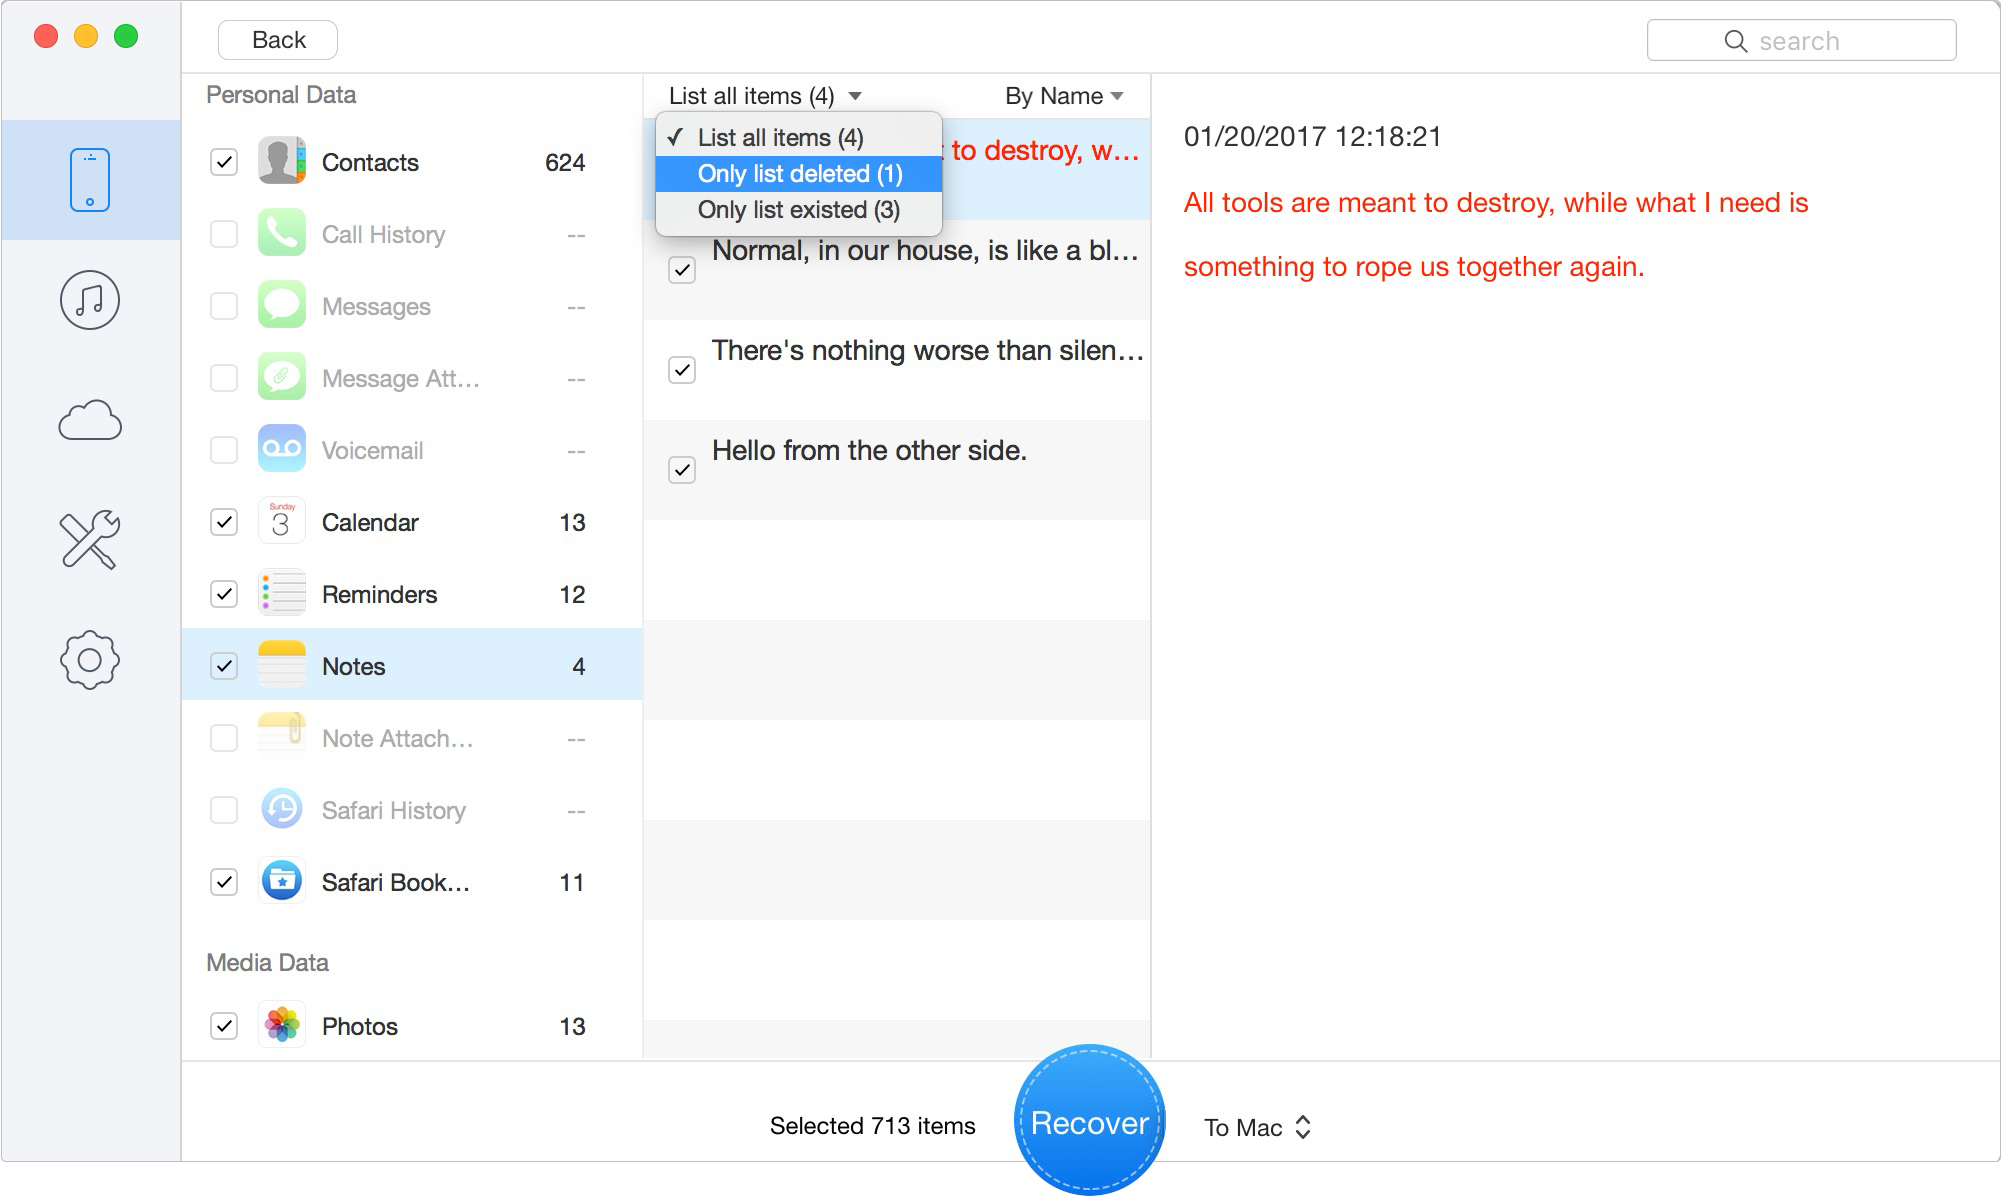
For the data you need to recover, please simply tick the box in front of it. After that, please select to recover the data to computer and then click  button.
Currently, Recover from DFU mode only supports the Mac version.
Design Simple and Beautiful Software
with Passion & Love
 Download
 Buy Now


