![]() by Abby on Oct. 13, 2016 | NO COMMENT
by Abby on Oct. 13, 2016 | NO COMMENT
Don’t know how to transfer all or part of data (music, photos, videos and more) from iPhone 7 or iPhone 7 Plus to your Mac /PC? Follow this guide to get some decent suggestions.

Don't have PrimoPhoto? Download it now prior to reading this guide and it will save you quite a lot of time. Click Here to Free Download
iPhone 7 integrates great entertainment experience and convenient business functions, storing most of our important data and favorite items, like photos with friends or music of your favorite singer. Not only does it represent a better display and battery life, iPhone 7 and iPhone 7 Plus are also popular worldwide for their advanced new cameral system and fantastic speakers. Taking photos and listening to music with iPhone 7 is a kind of enjoyment, and keeping these precious memories is vital to us. Transferring these data to computer is a good way. iTunes can transfer all your data from iPhone 7 to computer by making a full backup package, but you are not allowed to view those files on computer. And what if you only need to transfer selected data from iPhone 7 to Mac or Windows? For example: several photos, some songs or a few videos?
As a result, we’ll introduce how to transfer all or part of data from iPhone 7 to computer in this article. If you want to transfer all the data, you can use iTunes. If you want to transfer part of data (song, videos, photos) to computer, try the second and third way.
To transfer all data from iPhone 7 to computer, we need to download and install iTunes first, and also a USB cable compatible with your new iPhone 7 or iPhone 7 Plus.
Step 1. Connect your iPhone 7 with computer and open iTunes.
Step 2. Click the phone shaped button > Summary > Back Up Now, and then you can find your backup package on your computer.
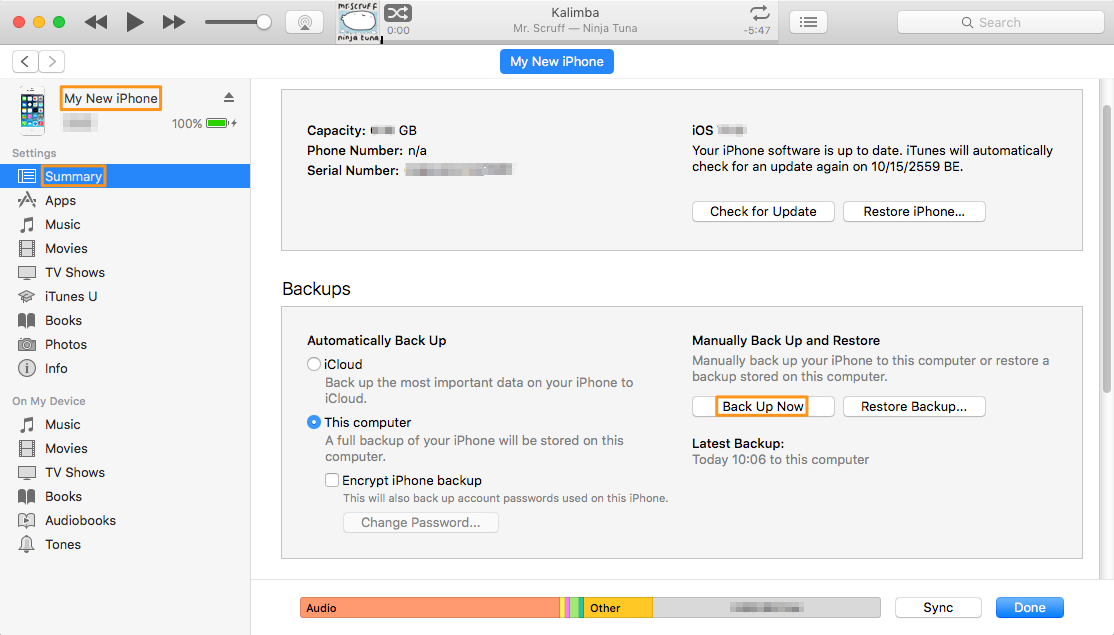
Transfer All Data from iPhone 7 to Computer – Step 2
First of all, you need to download and install PrimoMusic on your computer. Then your iPhone 7 or 7 Plus with music and a USB cable.
Step 1. Launch PrimoMusic and connect your iPhone 7 with Mac or Windows.
Step 2. Click Music > Export to Mac > Choose the music you want to transfer > Export.
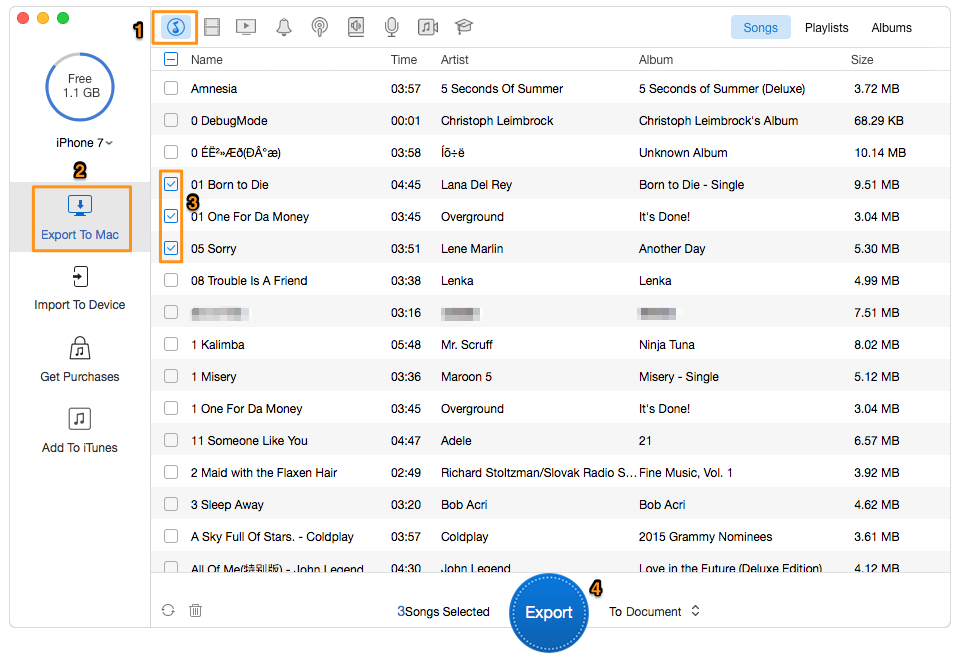
Transfer Music Data from iPhone 7 to Mac – Step 2
Step 3. After transferring, you can click your music in output folder.

Transfer Music Data from iPhone 7 Plus to Windows – Step 3
As we mentioned before, PrimoPhoto is definitely your good helper to transfer data, like photos and videos. Download and install PrimoPhoto now and follow this tip to finish your data transfer.
Step 1. Open PrimoPhoto and connect your iPhone 7 with computer with a USB cable.
Step 2. Export to Mac > Choose which category you want to pick from > select the photos you want to transfer > Export.
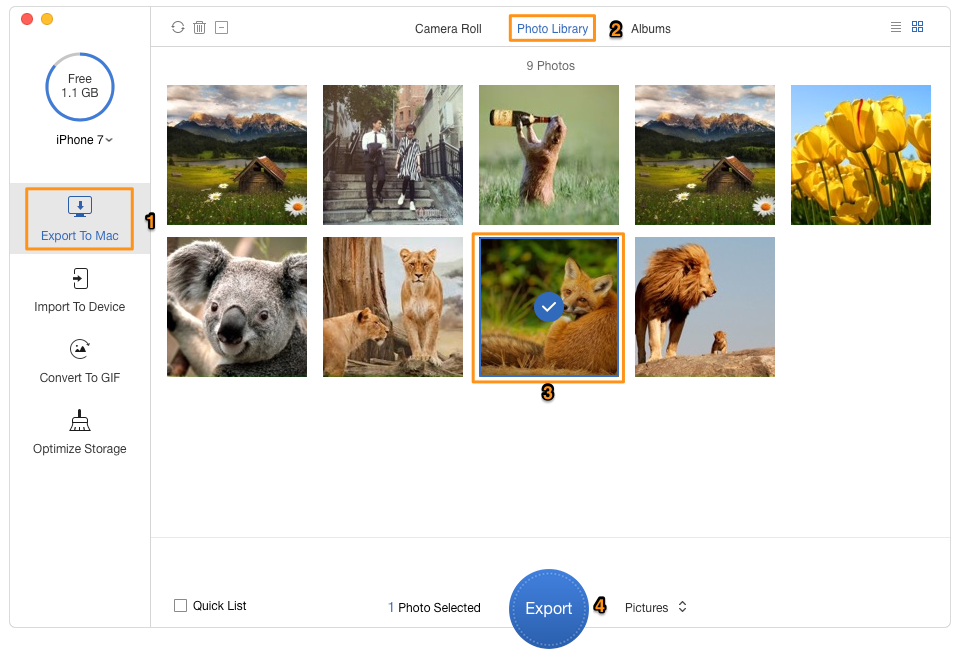
Transfer Photos from iPhone 7 to Mac – Step 2
Step 3. You can view your pictures on computer now.
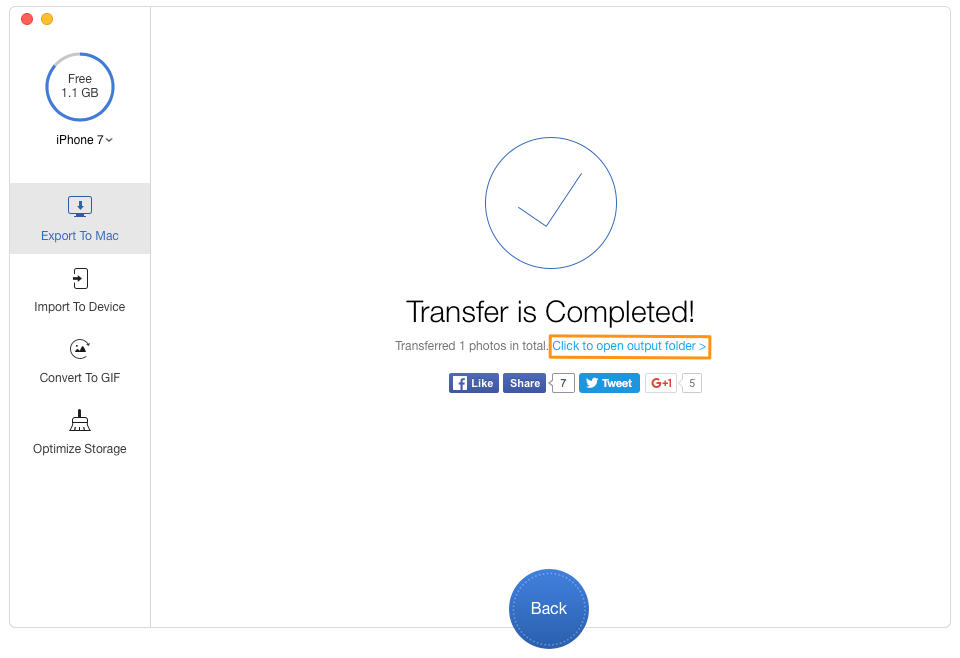
Copy Photos from iPhone 7 to Mac – Step 3
Designed to fit effortlessly into your iPhone photo management
Download NowIt goes without saying that PrimoMusic and PrimoPhoto are exactly suitable for us. They make data transferring easier and faster than ever with their professional functions and advanced features. The more you use them, the more you feel how helpful they are.


Abby Member of @PrimoSync team, an optimistic Apple user, willing to share solutions about iOS related problems.
Get Up-to-the-minute iPhone Tips & Enjoy Awesome Deals.
![]()
![]()
Design Simple and Beautiful Software
with Passion & Love